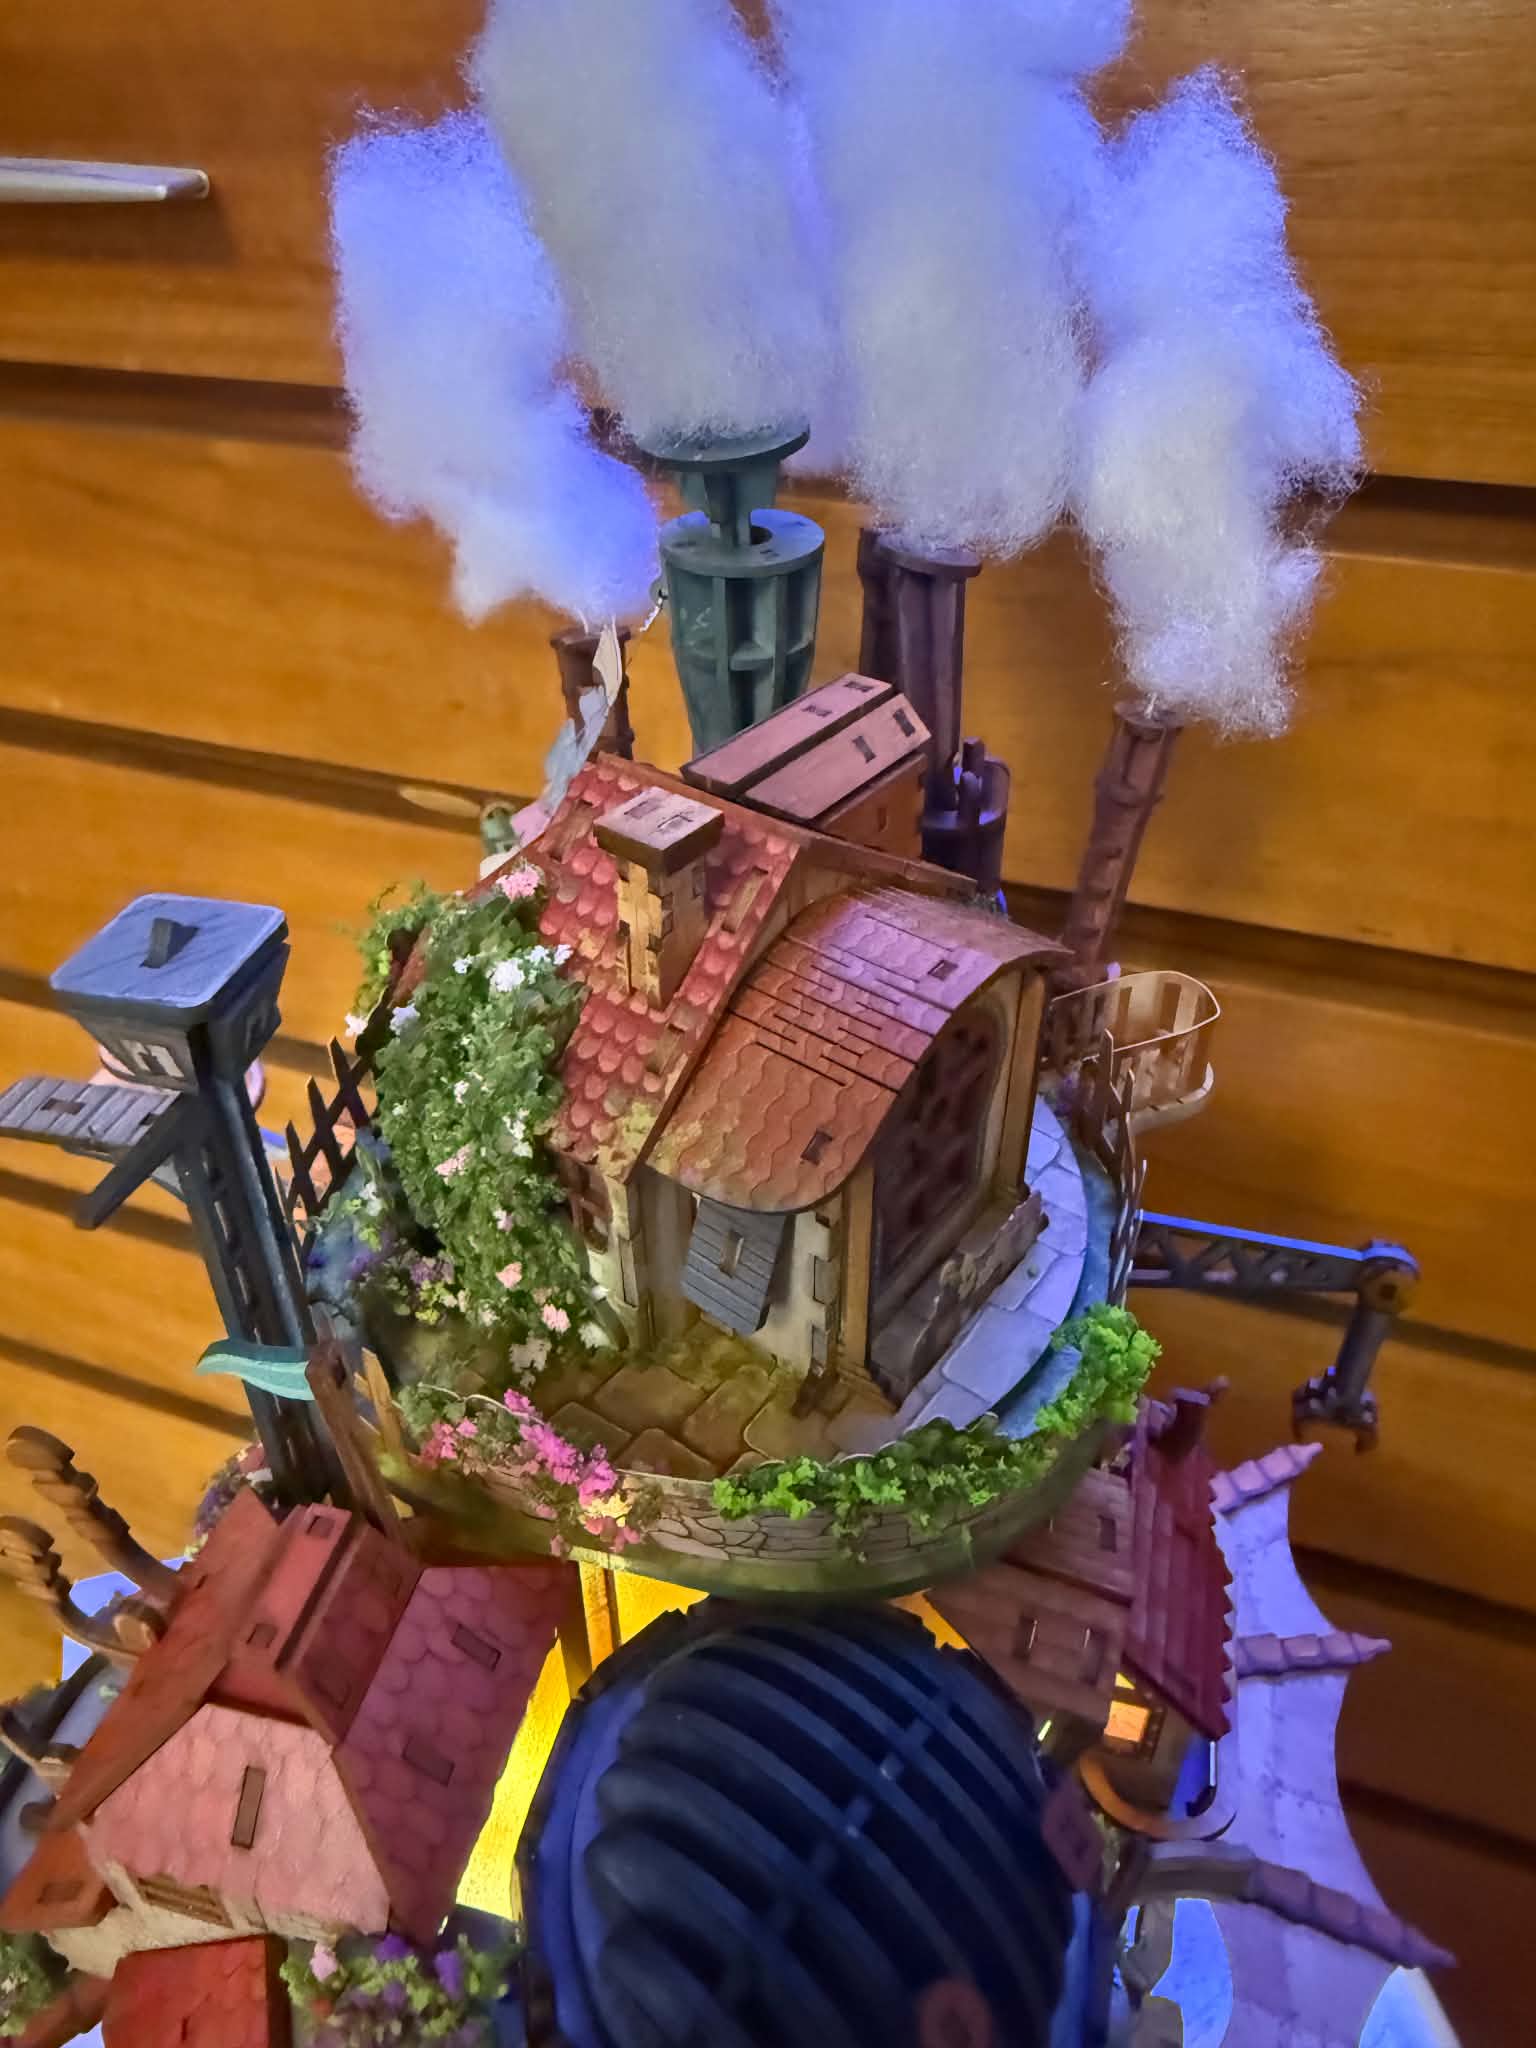
My build #32
Built & reviewed by Martin Seidler
Introduction
This one was something completely new for me.
Not a book nook. Not a dollhouse.
Instead, it is a fully mechanical fantasy machine inspired by a famous animated movie, and I must say right from the beginning: this thing is absolutely brilliant.
Because it is inspired by a fantasy world rather than a real object, the designers had complete freedom. And they clearly had a lot of fun with it.
What’s Inside the Box?

Inside the box you will find several MDF sheets of various thicknesses, ranging from about 1.5 mm to 3 mm depending on the structural requirements of individual parts. There is a string of LED bead lights woven throughout the entire build, two electric motors with gearboxes, various mechanical components, printed paper parts, translucent oil-paper window inserts, decorative accessories, wiring, a speaker and sound module, and even a real roller bearing used in one of the key mechanisms.
The amount of mechanical engineering packed into this kit is impressive.
Beginning the Build
The build starts with a functional test of all electronics, followed by the assembly of the main drive system.
One gearbox is located inside the base.
A second gearbox is built directly inside the castle itself.
Outstanding Instructions and Engineering
The instruction manual deserves special praise. It is one of the best manuals I have ever seen in a model kit. Everything is color-coded, important steps are clearly highlighted, warnings are placed exactly where they are needed, and the parts themselves are designed to prevent mistakes. Different notch widths and slot sizes make incorrect assembly almost impossible.

If a part does not fit, you can safely assume you are doing something wrong.
As an engineer, I absolutely loved that.
The precision of this kit is probably the best I have ever experienced.
Honestly, I do not think I have ever built anything with tolerances this good.
Nothing requires glue for structural assembly. Every connection is a tight friction fit. In fact, some builders may even find the fit slightly too tight and may want to wax the tabs before insertion. I personally had no issues with that, but the precision is simply outstanding.
Great job, Tonecheer.
Building the Castle Structure
After completing both gearboxes and performing the required functional tests, the construction moves to the castle itself.
This was another section I really enjoyed.
The structure is built around a rib-and-panel design that feels almost like assembling a small aircraft fuselage. The irregular shape requires some attention during assembly, but everything fits beautifully.
As always, I used furniture repair markers on all MDF edges and acrylic markers where colored surfaces benefited from touch-ups.
The wiring is surprisingly simple despite the amount of functionality packed inside the model.
One particularly clever feature appears during the castle assembly.
Temporary support skids are attached underneath the castle, allowing it to sit securely on the workbench during construction. Such a simple idea, yet incredibly practical.
Mechanical Engineering Highlights

Then comes one of my favorite mechanical moments of the build.
The rotating upper section uses a planetary gearbox.
As a mechanical engineer, finding a planetary gearbox inside a hobby kit immediately made me smile.
The kit also includes cams that drive the moving chimneys, traditional gear trains, crank mechanisms operating the wings, and multiple examples of practical mechanical motion conversion.
For anyone interested in learning basic machine design principles, this kit is almost educational.
Planetary gearboxes.
Cam mechanisms.
Cranks.
Gear trains.
Linkages.
It’s all there.
Fine Details and Assembly
The upper structures consist of many small buildings, roofs, pipes, chimneys, and decorative architectural details assembled from thinner MDF sheets. The work becomes somewhat fiddly, but the excellent tolerances keep frustration levels very low.

The thinner sheets require some care when removing parts, but Tonecheer anticipated this as well.
There are spare parts for many delicate components, which provides a nice safety net.
The castle gradually fills with countless little details, exhaust stacks, towers, roofs, pipes, and decorative elements.
The moving chimneys receive wire supports that later hold the artificial smoke effect.
Nothing feels repetitive for too long. There is always something new happening.
Eventually you reach the rotating rooftop garden, complete the propeller, install the final structures, and move on to the base.
Building the Walking Mechanism
The base contains the main drive mechanism responsible for the castle’s iconic walking motion.
This is another beautiful piece of mechanical design.
Wax is used extensively throughout the build to lubricate gears and bearings. I know some builders dislike working with wax, but I had absolutely no problems. The supplied wax bar was sufficient, and I used perhaps half of it.
The instructions include excellent illustrations showing exactly how far bearings and shafts should be inserted. Again, even builders with limited mechanical experience should have little trouble following along.
The main gearbox goes together smoothly, another functional test confirms everything is operating correctly, and then comes the rewarding part.
The castle is mounted onto the completed base.
The temporary support skids are removed, the castle is secured using a simple pin system, and the remaining decorative panels are installed.
Finishing Touches
The final step is creating the wings by attaching the translucent material onto their frames and adding the fluffy smoke effects onto the chimney wires.
Done.
And what a result.
Features in Motion
When powered through USB-C, the castle lights up beautifully from dozens of windows.
Press the button once and the castle comes alive.
The upper garden rotates.
The chimneys move up and down.
The wings flap.
The entire castle rocks and walks on its base.
Music begins playing through the integrated speaker.
Press again and the music stops while the motion continues.
It is charming, entertaining, and surprisingly mesmerizing to watch.
Durability and Reliability
How long will the mechanisms last?
Honestly, probably a very long time.
The gears are robust, the moving components are generously sized, and nothing feels fragile. Tonecheer clearly knew what they were doing, and this is not their first mechanical design. Their experience from previous mechanical kits definitely shows.
Ratings
Difficulty: 4/5
I would not recommend it as a first kit.
Intermediate to advanced builders will enjoy it the most.
Instructions: 5/5
Electronics: 5/5
Mechanical design: 5/5
Customization Potential
Customization potential:
Honestly, not much is needed.
You could add extra lighting effects, maybe some special smoke effects, or additional details if you really wanted to.
The only customization I performed was replacing much of the flat wooden greenery with realistic climbing vines and miniature foliage. I used green vines and climbing roses that closely matched the original colors and simply attached them over the existing decorative greenery using tacky glue.
The result adds extra depth while remaining faithful to the original design.
Final Verdict
Overall rating: 9.5/10
I almost never give a kit a score this high.
The only real question is whether you like the fantasy cartoon aesthetic.
If you do, this is honestly very close to a perfect kit.
Mechanically, electrically, and from an assembly standpoint, I struggle to find anything meaningful to criticize.
Build Race Bonus
As a bonus, I also participated in Tonecheer’s “race” to complete the first Walking Castle builds.
I did not rush or sacrifice quality to finish quickly. I built it exactly the way I build all my kits.
Still, I seem to have been among the first builders to complete it.
The kit arrived here in Central Europe on Friday afternoon, and by Saturday evening it was finished. My estimate is somewhere around 15–16 hours of build time.
A fantastic experience from beginning to end.
Highly Recommended


Copyright Book Nook Workshop 2026 – All rights reserved. (Martin Seidler)


Leave a Reply