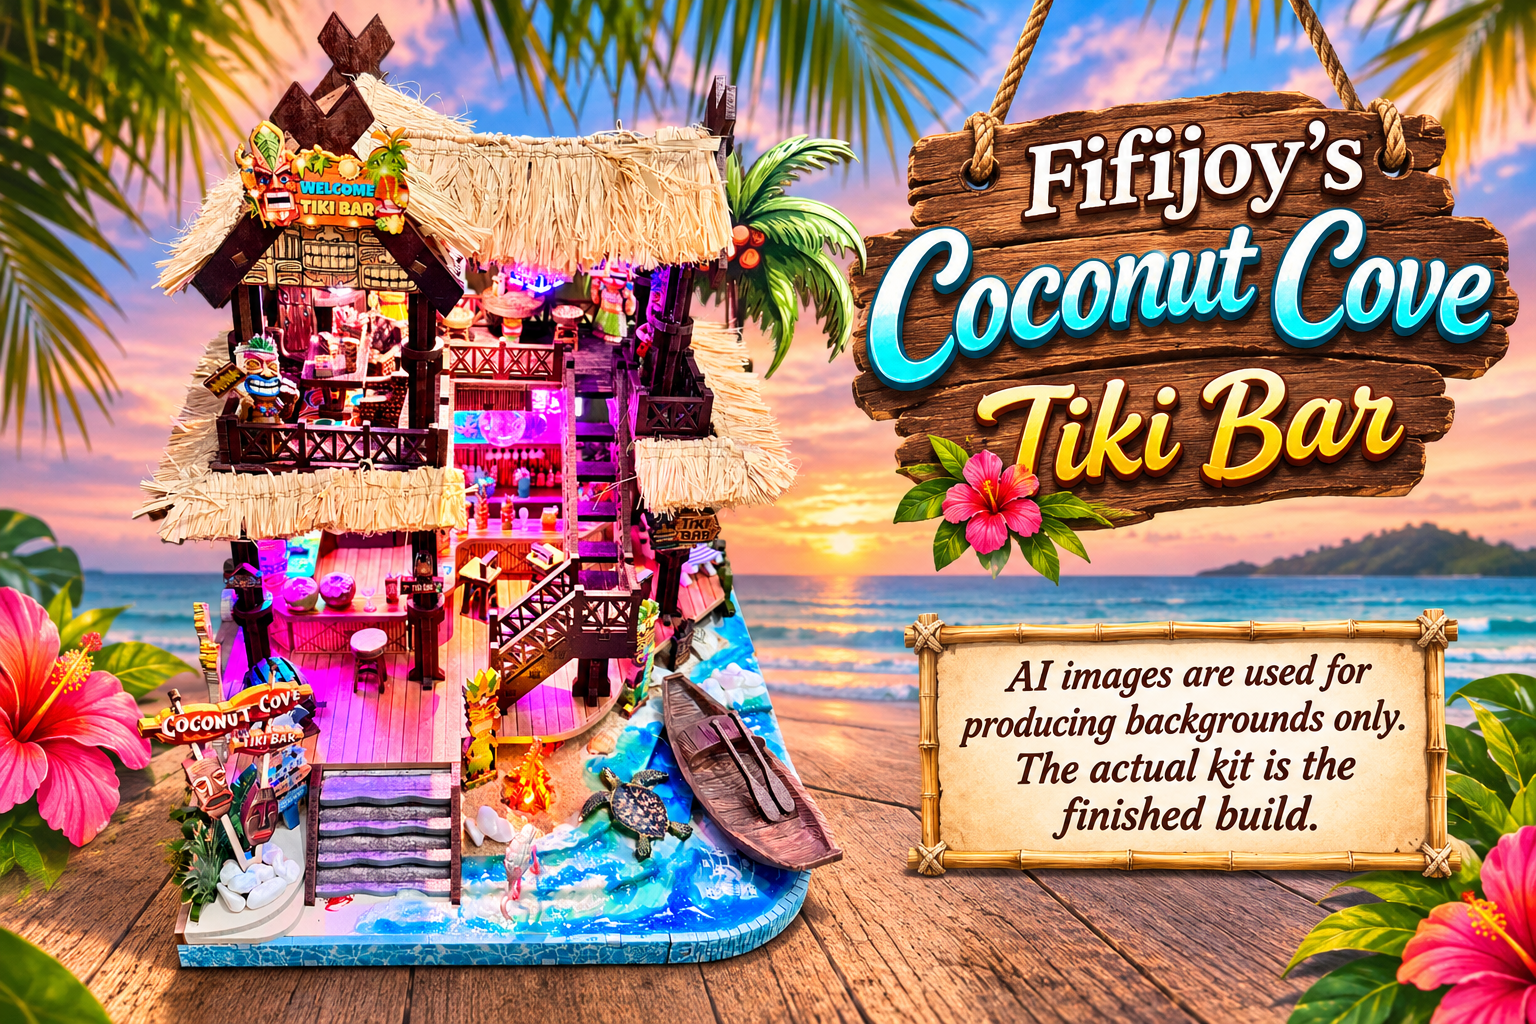
“Island vibes, clever details and a splash of creativity.”
Built and reviewed by: John A MacInnes. Build number 78, October 2026.
Fifijoy’s Tiki Bar: Tiki magic, tropical touches and plenty of character.
Shortened version – 500 words.
Coconut Cove Tiki Bar has been a thoroughly enjoyable build and one of the most straightforward kits I’ve tackled. Supplied directly by Fifijoy for review, it offers a cheerful tropical scene, plenty of scope for personalisation and, for the most part, a construction experience that went remarkably smoothly.
The kit includes ten full-size 2.5mm MDF boards, printed acrylic components, lighting, accessories and a 42-page, full-colour A5 instruction manual. The manual is logically laid out, with clearly numbered stages, illustrations of the components and useful wiring information. The pieces released cleanly from their boards, needing little more than a quick pass with a sanding stick to remove the laser-cutting nubs. I encountered no broken parts or troublesome fits during the build.
There were a couple of points where I would make a small change to the instructions. The touch sensor should be secured firmly with glue or strong double-sided tape before the retaining pins are fitted. I also found the collars around the uprights easier to fit before installing the uprights into the floor structure. These are minor suggestions rather than major criticisms, but they could save other builders some unnecessary fiddling.
The USB-powered lighting system adds plenty of character, with colour-changing gradient lamps and LED strips, as well as a warm white light. During my initial testing, the lighting loom worked as it should. I did replace the steady yellow firepit LED with a flickering one, which gives a more convincing flame effect. However, after the build, the lighting subsequently stopped working, despite having worked previously. I have not yet established the cause, so I would not want to claim the electronics are fault-free without resolving that issue.
Customisation was a big part of my enjoyment. I added sand, shells and white stones to the beach, then used blue, turquoise and white water gel to create a more three-dimensional shoreline. A flamingo, extra grasses, coconuts, glasses and correctly scaled 1:24 bottles helped bring the scene to life. I replaced the supplied boat with one from my stash, covered the chair and stool seats in yellow leatherette, and finished the roof with raffia to give it a more convincing Caribbean thatch. Not every idea made the cut: I left the tiki figures and palm trunk flat rather than risk damaging delicate parts.
The finished bar has real personality, and the extra details make it feel like a holiday destination rather than simply another miniature room. It also gave me plenty of excuses to raid my stash, which is great fun.
Overall, this is a well-produced, attractive kit that is easy to follow and offers plenty of opportunities to make the finished scene your own. The construction itself gave me almost nothing to complain about, which is unusual enough to deserve a mention. The lighting issue that appeared afterwards remains a question mark, but Coconut Cove has otherwise been a genuine pleasure to build. A little tropical sunshine on the workbench, without having to leave Scotland.
And that’s why it has received a very rare score of 100%.
Full review – Introduction

Well, that didn’t take long, did it? In my last review, I was freezing my bits off at Tonecheer’s Ice Rink, watching miniature skaters go round in circles. Now, apparently, I’ve decided enough is enough and I’m off to the Caribbean. No more ice, no more winter wonderland and absolutely no chance of needing a scarf. At least, not unless the air conditioning in the workshop gets a bit enthusiastic.
This time, we’re heading for Coconut Cove Tiki Bar, a rather dramatic change of scenery from my previous build. We’ve gone from ice skates to cocktails, from winter woollies to tropical sunshine, and from worrying about whether the skaters are going to move properly to imagining somewhere you could happily sit beneath a palm tree and watch the world go by.
Of course, there is one rather obvious problem with this arrangement. I’m building a Caribbean setting here in Scotland, where the weather can make a tropical paradise feel about as realistic as a snowman ordering a piña colada. Still, there’s no harm in dreaming, and if I can’t get myself to a Caribbean beach, I can at least attempt to bring a little of it to the workbench. It’s considerably cheaper than a fortnight in the sun, although, knowing this hobby, it might not be quite as relaxing.
A Tiki bar offers plenty of opportunities for character. Tropical styling, colourful decorations and all those little details that should make the place feel like a proper island hideaway. Get it right and you can almost imagine the gentle sound of waves, the rustle of palm leaves and someone asking whether you’d like another drink. Get it wrong and it could look like a garden centre has been raided by a cocktail enthusiast with questionable taste.
And then there’s my customisation nose, which is already twitching.
As always, I’ll be looking beyond the pretty pictures. The quality of the components, the instructions, the construction and the lighting will all get the usual scrutiny. A convincing Caribbean hideaway needs more than a few palm trees and something that looks vaguely tropical. It needs atmosphere, character and enough attention to detail to make you wish you were there.
So, let’s clear the workbench, put the winter gear away and see whether Coconut Cove Tiki Bar can deliver a little Caribbean magic. After the Ice Rink, I’m certainly ready for some warmer surroundings. Now, if only the kit came with a real cocktail and a hammock, we’d be getting somewhere.
A perfect score of 100% is something I award very rarely, so when a kit achieves it, you know it has done something rather special. Coconut Cove Tiki Bar has earned a full 60 out of 60, picking up top marks in every category of my scoring system. That’s no small achievement, particularly in a hobby where there’s almost always something to criticise, improve or fiddle with. Fifijoy has delivered a kit that impressed me from the building experience through to the finished result, and it has thoroughly earned its place among my very best builds and top five kits. A perfect score, and one I’m delighted to award.
The inspiration behind Coconut Cove Tiki Bar

Something like this on a tropical beach could very easily have been the inspiration for Fifijoy’s designers.
So, where exactly does the inspiration for a Tiki bar come from? Well, we’re heading into the world of tropical beaches, island hideaways and those wonderfully over-the-top bars where the décor is almost as colourful as the drinks. Think palm trees, bamboo, exotic decorations and somewhere to sit with a cocktail while pretending you haven’t got a mortgage, a pile of household chores or a Scottish winter waiting for you back home.
The Tiki bar concept has its roots in the mid-20th-century fascination with the South Pacific and Polynesian-inspired surroundings. In the United States, particularly from the 1930s onwards, themed bars and restaurants began creating escapist environments filled with tropical imagery, elaborate décor and exotic cocktails. They offered customers the chance to step out of everyday life and into an imagined island paradise, even if the nearest ocean was several hundred miles away.
Of course, a Caribbean beach and a traditional Polynesian-inspired Tiki bar aren’t quite the same thing geographically or culturally. But the modern tropical-bar aesthetic often borrows from a broad mix of island imagery, beachside relaxation and colourful resort styling. For a miniature kit, that opens up plenty of possibilities: natural-looking materials, vibrant colours, decorative details and the sort of atmosphere that makes you want to pull up a stool and stay a while.
And that’s what interests me about Coconut Cove. Can the kit capture that relaxed, tropical feeling in miniature? Does it create a convincing little escape, or will it leave me feeling that something is missing? A few palm trees and a brightly coloured bar are a start, but the real character comes from the details and how well they work together.
There’s also the question of how much room the design gives the builder to make it their own. Tropical settings practically invite a bit of personalisation, whether that’s adding texture, enhancing the colours or introducing extra details to make the scene feel lived in. Naturally, I’ll be keeping an eye out for opportunities to improve things — although I shall try to resist turning the whole project into a major renovation before I’ve even finished the basic build.
One thing’s for certain: after the frozen world of the Ice Rink, this is a welcome change of climate. Whether Coconut Cove can transport me from a chilly Scottish workbench to somewhere with warm sand between my toes remains to be seen. I suspect the only sand I’ll actually encounter will be the sort used for miniature scenery, and the closest I’ll get to a rum punch is probably a mug of tea beside the glue pot.
The price

Now, before anyone accuses me of enjoying a free trip to the Caribbean at somebody else’s expense, I should point out that Coconut Cove Tiki Bar was supplied directly by Fifijoy for review purposes. That means I haven’t had to put my hand in my own pocket for this particular build, but it doesn’t mean I’m going to let the manufacturer off the hook when it comes to value for money.
The kit is available directly from the Fifijoy website, where the listed price is $55.99. That’s approximately £44 before any discount, although the final amount charged in pounds may vary depending on the exchange rate and payment method.
And here’s where Book Nook Workshop readers have a little advantage.
Through the dedicated Fifijoy discount link on the Book Nook Workshop website, you can get 15% off. That brings the equivalent price down to around £36, based on the exchange rate used for this review. Not bad for a little slice of Caribbean escapism without the expense of flights, airport parking and discovering that your hotel room overlooks the bins rather than the beach.
Of course, the price is only part of the story. A kit can look wonderful in the photographs, but what really matters is what you get for your money: the quality of the materials, the standard of the instructions and, ultimately, how well everything comes together.
That’s what I’ll be examining as the review progresses. Fifijoy has kindly supplied Coconut Cove for review, but the verdict on whether it’s worth buying depends on what I find inside the box and how it performs on the workbench.
The kit


Right, let’s have a look at what we’re dealing with before we start dreaming of palm trees, tropical cocktails and a life where the biggest decision of the day is whether to have another drink.
Coconut Cove Tiki Bar comes with ten full-size boards of 2.5mm MDF, along with an assortment of printed acrylic pieces, the lighting rig, stickers, double-sided tape, two lamp units and a small glass bead.
It’s an interesting mix of components, particularly the printed acrylics and separate lamp units, which should help bring some character to the finished scene. The glass bead has caught my attention, too, although I’ll hold off guessing what it’s for until the instructions reveal all. There’s little point in confidently announcing its purpose now, only to discover I’ve got it completely wrong.
One thing I really do have to give Fifijoy credit for is the sheer number of spare parts supplied with this kit. In fact, I don’t think I’ve ever come across a kit with quite so many. There must be the equivalent of at least a full sheet’s worth of additional bits and pieces left over once you’ve identified what you need for the build. That’s a pretty generous allowance, and it gives you plenty of options if you happen to damage a small component, need a replacement or simply fancy experimenting with a few extra details. It’s always reassuring to know you’ve got spares available, but this is on another level. Fifijoy certainly hasn’t been stingy with the leftovers!
The lighting will be worth examining as the build progresses, but for now, the important thing is to establish what Fifijoy has supplied and how everything fits together. The number of boards alone won’t tell us how demanding the construction will be, and the real test will come when I start assembling the pieces.
What’s in the box?
Rather than simply tell you what’s in the box, I’ve done something a little different this time. I’ve filmed an unboxing video so you can join me as I work my way through the contents of Coconut Cove Tiki Bar. You get to see what’s supplied, take a closer look at the components and, hopefully, get a better idea of what you’re letting yourself in for before ordering one.
Of course, putting a camera in front of me was always going to introduce a few additional opportunities for things to go wrong.
Enter Freddy Fat Fingers.
That’s my affectionate name for the chap who occasionally manages to turn a straightforward job into an exercise in clumsiness. On this occasion, my overhead phone holder decided it would rather be on intimate terms with the tabletop than remain suspended obediently above the workbench. One moment it was doing its job; the next, it was attempting to kiss the table.
Note to self: tighten all the joints properly before pressing record. Apparently, gravity doesn’t care whether you’re halfway through filming an unboxing video.
Then there’s the small matter of whether I actually managed to get everything on camera. Did I show you every component, or did something important remain just outside the frame? And, more importantly, did the phone stay in focus long enough for you to see what I was pointing at?
I’m not going to spoil the fun by telling you how well — or otherwise — I managed to capture everything. You’ll have to watch the video and judge for yourself. Feel free to be generous with your verdict, although I accept no responsibility for any sudden urges to shout, “Move the camera!” at your screen.
The instruction manual

The instruction manual comes in A5 format and runs to 42 pages, all in full colour. That’s a promising start, particularly when you’re dealing with a kit containing a mixture of wooden components, printed acrylics and lighting that needs to be connected correctly.
The opening pages are particularly helpful, providing illustrations of the boards, electronics and accessories, along with a guide showing where the various cables connect to the printed circuit board (PCB). Having that information available before you begin makes it easier to familiarise yourself with the contents and understand how everything fits together.
There’s another useful feature that deserves a mention. The manual identifies pieces that are prone to breaking, giving you an opportunity to take extra care when removing and handling them. It’s a simple but welcome precaution. There’s nothing quite like snapping a delicate component before you’ve even worked out where it belongs, particularly when the only replacement option is to reach for the glue and hope nobody notices.
Having read through the instructions and made notes of the customisations I’d like to try along the way, my initial impression was encouraging. The layout appeared logical, the individual steps were clearly marked and everything looked easy enough to follow.
Naturally, there’s a difference between reading through a manual in comfort and trying to follow it while juggling tiny pieces, adhesive and a pair of tweezers. I’d reserve my final judgement until I’d put it to the test during the build, but so far, Fifijoy appeared to have given the builder a sensible guide to working through Coconut Cove Tiki Bar.
The boards


Right, let’s have a proper look at those ten MDF boards, because this is where the quality of a kit starts to become apparent.
The boards are made from 2.5mm MDF, and the laser cutting is clean and well defined. The pieces released nicely, with no obvious splintering or damaged edges to spoil the experience. That’s always encouraging, because there’s nothing quite like having a delicate component snap before you’ve even had the chance to work out where it belongs.
The printed components are also looking good. The colours are clear and the detail is nicely defined, giving the decorative elements the sort of finish they need to help bring Coconut Cove to life. With a tropical-themed kit, those little details matter. You want something that looks like an inviting island hideaway, not a beach bar that’s been assembled during a particularly violent hurricane.
One thing I always appreciate is being able to identify the boards and their components without having to squint at microscopic lettering. When you’re working with multiple sheets and dozens of small pieces, clear markings make life considerably easier. Nobody wants to spend half an evening searching for one tiny part when there are cocktails to be imagined and a tropical paradise to construct.
The 2.5mm MDF provides a decent, substantial material for the main structure, while the printed acrylics add variety to the components supplied. My examination of the materials gave me a positive first impression, with little to raise a red flag.
Lighting and electronics


There’s rather more to the electronics in Coconut Cove Tiki Bar than simply switching on a few lights and hoping for the best. The kit uses USB power, so there’s no battery pack to worry about, and the manual provides a wiring diagram showing how the various components connect to the PCB.
The lighting arrangement includes colour-changing gradient lamps, a warm white lamp and colour-changing LED strips, together with the touch board, switching board and PCB. There is no infrared sensor in this kit, despite what an earlier interpretation of the manual might suggest.
The gradient lamps, connected via blue and green sleeved wires, provide colour-changing light, while the white-wired lamp gives off a steady, warm white glow. The LED strips are colour-changing, too. In other words, once everything is switched on, this little Caribbean hideaway has quite the disco atmosphere. All we need now is a DJ, a few cocktails and somebody prepared to dance like nobody is watching.
I did encounter a problem with the lighting cable after the initial testing, when the lights stopped working altogether. The USB power source itself was fine, so the cable was the culprit. Replacing it sorted the problem, and the lighting is now working properly.
There was, however, one change I wanted to make to the firepit. The supplied LED produced a steady yellow light, which illuminated the area perfectly well but didn’t really convince me as a fire. Real flames flicker, after all, and a permanently glowing yellow light looked a little more like a miniature streetlamp than a firepit.
So I cut out the original LED and replaced it with a flickering one. I’m much happier with the result, as it gives the firepit a far more convincing appearance and adds some welcome atmosphere to the scene. Given the colourful lighting elsewhere in the kit, I’m a little surprised Fifijoy didn’t include a flickering LED for the firepit in the first place.
If you ever thought about adding to or changing your lighting, here’s some handy tips
The build

Right, enough looking at the bits. It’s time to start sticking them together.
Thankfully, Fifijoy doesn’t keep us hanging around for long before getting the construction underway. Page 6 gets things moving with the base plate, which will eventually support the top floor. That gap between the two levels isn’t just there for architectural effect, either. It’s where the cabling is hidden, keeping the wiring out of sight rather than leaving us with something resembling a plate of electronic spaghetti.
The early stages are also a reminder that you need to think ahead. Some of the components you’re fitting now will eventually be hidden beneath later sections, so it’s worth taking a moment to understand what you’re doing before reaching for the glue. There’s nothing quite like confidently sticking something in place, only to discover five minutes later that you’ve just blocked access to something important. Ask me how I know. Actually, don’t. We haven’t got all day.
Step 3 introduces the touch sensor switch, and this is where I’d recommend a little extra attention. The manual tells you to position the sensor and clamp it in place using parts E13. Now, perhaps I’m just a suspicious old builder who’s seen too many things go wrong, but I wouldn’t trust those holding pins to do the job on their own.
My advice is to give the sensor some extra security before fitting the pins. You can glue it in place, or do what I do and use 3M high-strength double-sided tape. Once the sensor is firmly attached, fit the holding pins to keep everything in position.
Why make such a fuss over one tiny component? Because if the sensor isn’t properly secured, those pins can work loose and allow it to detach from its intended position. It can then end up too far away from the marked spot on the underside of part B4, and the touch switch may not work correctly.
And there’s nothing quite like having to investigate an electrical problem because one little sensor has decided to go walkabout. You can imagine the conversation: the lights aren’t working. Have you checked the wiring? Have you checked the connections? Have you checked whether that tiny sensor has buggered off somewhere it shouldn’t be?
It’s much easier to secure it properly now than to start dismantling things later in search of electrical gremlins. A little extra effort at this stage could save a considerable amount of swearing further down the line — and I’d much rather save that for the bits that really deserve it.
As the base begins to take shape, the golden rule is simple: take your time, think a stage ahead and don’t assume that because a component is going to be hidden, it doesn’t matter how well it’s fitted. Nobody will see the cabling once the upper floor is in place, but you’ll certainly know about it if something goes wrong underneath.
A forgotten piece – or was it?
By the time I reached page 11, something rather unusual had happened. I was sitting at the workbench, building away quite happily, when that nagging feeling crept in that I’d forgotten to do something.
You know the feeling. You stop what you’re doing, go back to the manual, check you’re on the right page, check you’re following the right step and convince yourself that somewhere along the line you’ve missed something important. Except, for the life of me, I couldn’t work out what it was.
Then I spotted my notebook, and the penny finally dropped.
I’d made it through all the base-building stages without a single issue worth mentioning. Not one. No missing pieces, no awkward fits, no mysterious components left over and no need to resort to language that would make a Glaswegian docker blush.
How often does that happen, I asked myself? The answer, in my experience, is very rarely indeed!
I’ve probably spent as much time colouring the edges of the MDF as I have actually building the thing, but that’s my own particular brand of miniature madness. The important point is that the construction itself has been remarkably straightforward.
In fact, it’s almost unnerving. I’m so accustomed to finding something that needs adjusting, fixing or investigating that when everything goes according to plan, I start wondering what I’ve forgotten. That’s quite an achievement for a kit: making the builder think he’s made a mistake when, for once, he actually hasn’t.
So far, Coconut Cove Tiki Bar is proving to be a very agreeable build. Long may that continue — although I’ve probably just tempted fate by saying so!
First tip of the day

I’m genuinely surprised by how smoothly this build is progressing. I’m rattling through the manual, following the steps in order, and the model is coming together pretty much exactly as Fifijoy intended. Step by step, it’s proving to be an easy guide to follow, and I’m beginning to wonder if I’ve accidentally picked up somebody else’s kit.
Then, at last, my pen got an outing. Page 25, step 82, to be precise. After all that peaceful construction, Freddy Fat Fingers had finally found something to get his fingers into a proper muddle over.
The job involves fitting collars, each made up of two parts, around the structure assembled at step 80. Getting these little blighters into position was no easy task, I can tell you. There was fiddling, manoeuvring and a fair amount of wondering whether my fingers had suddenly developed a mind of their own. I never knew I was quite so bendy until I reached this stage!
Eventually, though, we got there. The collars were in place, and I could move on without having to declare a national emergency at the workbench.
However, this is one occasion where I think the manual could have made life considerably easier. Rather than leaving the collars until step 82, I’d suggest fitting them at step 80 or 81, before moving on. That way, you can position them while you still have better access, then simply insert the two tenons on the pillars into the mortises in the floor.
It would be a much more straightforward operation, with less fiddling around trying to fit the collars once everything else is in the way. Sometimes the order in which you assemble things makes all the difference, and this is a good example of where a small change to the instructions could save the builder a lot of unnecessary gymnastics.
So, Fifijoy, if you’re listening, consider that a little tip from Freddy Fat Fingers. The kit is still building beautifully, but there’s no harm in making an already good set of instructions just that wee bit better!
Well, hold the boat, folks! What do you know? I turn the page to page 26, reach step 86 and discover that Fifijoy has beaten me to it. The instructions now tell you to fit the collars before inserting the uprights assembled in steps 84 and 85.
So it seems somebody on the design team has recognised that these little blighters are much easier to fit before the uprights go into the floor structure. Either that, or they’ve been watching Freddy Fat Fingers at work and decided to take pity on the rest of us!
Joking aside, it’s good to see the instructions taking this approach. It makes the assembly more straightforward and avoids the fiddly business I encountered a page earlier. If only they’d applied the same thinking to step 82, I might have saved myself a few minutes of miniature gymnastics.
Still, credit where it’s due. The advice is there on page 26, and from this point onwards, at least we know the collars can be fitted before the uprights go into position. I’ll chalk my earlier struggles up to experience — and perhaps keep my notebook a little closer to hand!
Customisations

Now, regular readers will know that I have a bit of a problem when it comes to customising kits. I can start with the best intentions in the world, but before long I’m looking at perfectly good components and wondering what I can do to make them a little different. Coconut Cove was never going to escape entirely unscathed!
I started with the beach area, adding sand to give it some proper texture, along with a selection of shells from my stash and some attractive white rocks. Then it was time to get the water gel out and create a more three-dimensional effect across the shoreline.
Using blue, turquoise and white, I worked the colours into the surf to give the impression of waves washing onto the beach. I’m pleased with the result, as it has achieved exactly what I was hoping for. The water now has more depth and texture, rather than looking like a flat printed surface. A little miniature beachcombing, a dollop of water gel and suddenly we’re getting closer to that tropical paradise. Be careful, though, and don’t cover the touch sensor area with your water-effect paste.
The boat was next on my hit list. For whatever reason, I just wasn’t taken with the one supplied in the kit. It was a bit of a ‘skeleton’ boat and certainly didn’t look seaworthy. So I had a good rummage through my stash to see if I could find something more suitable. And lo and behold, up popped a little craft that I thought was much better suited to visiting an island bar. Much better! After all, if you’re going to spend the day drinking cocktails at a beach bar, you need to arrive in style. Nobody wants to turn up in the miniature equivalent of a shopping trolley with a dodgy wheel.
Next came the drinks. The kit includes a selection of pre-printed, two-dimensional beverages, but there was so much colour on them that edge-colouring every single one wasn’t really practical. I concentrated on the larger pieces instead, giving those a neater finish without spending the next three weeks hunched over the workbench with a paintbrush the size of an eyelash.
Looking at them on the bench now, I’m glad I took the time to do it. Those little finishing touches make a difference, and the drinks look much better for the extra attention.
I also raided the stash for a couple of the smallest coconuts I could find. Admittedly, they’re out of scale, but they still look perfectly acceptable to my eye. And that’s the important thing with customisation: sometimes you have to decide whether something works visually rather than get the measuring tape out and declare the entire tropical holiday cancelled because a coconut is a few millimetres too large.
One important point about scale. Most kits are 1:24 and that makes finding suitable accessories a difficult proposition. I added glasses to the bar top and searched through my stash for the smallest suitable accessories I could find. Some of the items aren’t an exact scale match, but I did the best I could with what was available. The aim was to make the scene look convincing without introducing anything so oversized that it distracted from the finished model.
And boom! Before you knew it, a bar was born. All it needs now is a barman, some decent music and a strict rule that nobody asks me to build anything else until I’ve finished my cocktail. Mind you, knowing my luck, I’ll probably end up customising the cocktail as well.
I had also considered rounding off the edges of the tiki figures standing on the beach, along with the trunk of the palm tree. However, after examining the figures, I decided there were simply too many angles to tackle sensibly. Rather than risk making a mess of them, I left them as flat, two-dimensional pieces, but coloured the edges to match their fronts. It gives them a neater finish without risking damage to the figures themselves.
The palm tree trunk presented a slightly different problem. Towards the top, the material is only a few millimetres thick, and taking a sander to it could easily have compromised its structural integrity. I decided that wasn’t a risk worth taking. There’s a fine line between improving a component and turning it into several smaller components scattered across the workbench.
Sometimes, knowing when not to customise something is just as important as knowing what to change. That might sound suspiciously like wisdom, but don’t worry — I’m sure I’ll be back to meddling with something shortly.
One change I was particularly keen to make involved the firepit. The supplied LED produced a steady yellow light, which illuminated the area perfectly well but didn’t really convince me as a fire. Real flames flicker, after all, and a permanently glowing yellow light looked a little more like a miniature streetlamp than a firepit.
So I cut out the original LED and replaced it with a flickering one. I’m much happier with the result, as it gives the firepit a far more convincing appearance and adds some welcome atmosphere to the scene. Given that the other LEDs and lighting strip supplied with the kit are coloured and colour-changing, I’m a little surprised Fifijoy didn’t include a flickering LED for the firepit in the first place. Even with making this change I am not prepared to drop a point for lighting and electronics as the supplied LED would have worked, just not as well as my own flickering version.
Next up on the customisation bench were the two chairs and single bar stool. The seats come with a printed wood effect, which looks fine in itself, but I could see a potential problem when it came to assembling them. The legs have tenons that fit into the underside of the seat pieces, and matching those up neatly with the printed finish was going to be a bit of a faff.
So, rather than spend ages trying to make everything match up perfectly, I decided to give the seats a leatherette covering instead. That solved the problem and gave me the chance to introduce a little extra colour into the scene.
I wanted something that complemented the overall design without disappearing into the background, so yellow it was! It’s a nice, bright splash of colour that adds a bit of personality to the seating and gives the beach bar another little detail of its own. Besides, if you’re going to sit at a tropical Tiki bar, you might as well do it in style. Those chairs are now considerably more colourful than anything I’ve got in my own living room!
There were still a few finishing touches I wanted to add. I started by placing a couple of grasses at the foot of the palm tree. Apart from adding a little extra greenery, they do a rather useful job of drawing the eye away from the fitting point at the base. It’s a small detail, but one that makes the area look much more natural.
Next, I decided the shallow water was looking a little lonely. What it needed, clearly, was a flamingo! A rummage through the stash produced just the right candidate, so out came the pink and black pens and a little feathered visitor was soon ready to take up residence. Every tropical paradise needs a flamingo, surely? I mean, you don’t see many of them hanging around the Clyde.
I did have plans to add a couple of people to the scene, perhaps enjoying a drink at the bar and another relaxing on the sun lounger. Unfortunately, finding suitable scale figures in my stash proved difficult. I made do with the smallest accessories I could find, rather than introduce figures that looked completely out of place. I’m not going to start throwing in oversized holidaymakers just to fill a space. Even in miniature, there are standards!
Having finished all that, I stood back to admire my handiwork. And then, as is so often the case with me, I spotted something else. The roof.
The supplied thatched roof is a lovely colour and shape, and there’s absolutely nothing wrong with it. But I found myself thinking I could perhaps do something a little better. This is where the customisation nose starts twitching again, and before long I was off to Amazon in search of raffia that looked more like the thatched covering you’d expect to find on a Caribbean beach bar.
Once it arrived, out came the scissors and the shaping began. After cutting the raffia to size, I glued it into position, working it across the roof to give it the look I had in mind.
And I have to say, I’m absolutely delighted with the result. For me, it finishes the whole thing off beautifully and gives Coconut Cove that extra bit of tropical character. Sometimes a small change makes all the difference, and this was definitely one of those occasions.
At this rate, the only thing left to customise is the weather. Unfortunately, I don’t think Amazon sells Caribbean sunshine in a roll!
My thoughts – a little slice of Caribbean paradise

Well, it’s fair to say that my trip to foreign shores and Coconut Cove Tiki Bar, courtesy of Fifijoy, has been an absolute delight.
And I really do mean that. There genuinely wasn’t a single fault with the actual construction. Now, coming from someone with a hawk eye for detail and a notebook that’s usually getting more exercise than the glue bottle, that’s quite an achievement. Only a small number of kits I’ve built have managed to get through the entire process without giving me something to grumble about, and this was one, hence it’s 100 per cent score, and a kit that’s jumped into my top five.
The parts released without difficulty, and a quick brush over with a sanding stick to remove the little nubs left by the laser cutter was all that was needed. Add a touch of edge colouring and off we went. No broken pieces, no awkward fitting and no wrestling with components that clearly had other ideas about where they should go. It was refreshingly straightforward.
The instruction manual deserves credit, too. It’s a logical, easy-to-follow guide, with clearly illustrated stages that take you through the construction without leaving you scratching your head every five minutes. I was genuinely surprised at how quickly I was progressing. In fact, by page 11, I was so accustomed to finding something wrong that I actually thought I’d missed a step. I’d done everything correctly. Imagine that!
There were a couple of useful points worth passing on. The collars at step 82 would have been easier to fit before installing the uprights, as the instructions subsequently demonstrate at step 86. I’d also recommend securing the touch sensor properly with glue or strong double-sided tape before fitting its retaining pins. Neither is a major issue, but both are worth bearing in mind if you’re building the kit.
The electronics provide plenty of character, too. The USB-powered system includes colour-changing gradient lamps and LED strips, alongside a warm white lamp. I did have a problem with the lighting cable, but replacing it resolved the issue and the lights are now working properly. I also replaced the steady yellow firepit LED with a flickering one, which gives a much more convincing effect. This beach bar certainly isn’t going to suffer from a lack of atmosphere. In fact, it might be worth checking the neighbours aren’t complaining about the noise and light pollution!
And then, of course, there’s the customisation. Regular readers will know that leaving a kit exactly as supplied isn’t always my strongest suit. I added sand, shells and white rocks to the beach, used water gel with blue, turquoise and white to create a more three-dimensional surf effect, and replaced the supplied boat with one from my stash that I thought was much better suited to an island getaway.
I also added coconuts, glasses and the smallest suitable accessories I could find for the bar. Finding suitable additions wasn’t quite as straightforward as rummaging through the stash and picking the first thing that looked the part. I gave the seating yellow leatherette coverings and spent time finishing the edges of the drinks and other components. Some ideas, such as rounding off the Tiki figures and palm tree trunk, were sensibly abandoned when I realised the risks outweighed the benefits. There’s a lesson in there somewhere: customisation is about knowing what to improve, but also knowing when to leave well enough alone for risking causing damage rather than an overall positive benefit.
What I particularly like is that the kit gives you a very good starting point without making customisation feel compulsory. You can follow the instructions and enjoy a perfectly good build, or you can take a few liberties and add your own personality. I chose the latter, naturally. Freddy Fat Fingers may have had a few moments along the way, but even he managed to get through this one without causing a major incident.
So, where does that leave us?
For me, Coconut Cove Tiki Bar is one of those rare kits where the components, instructions and construction come together to make the building experience genuinely enjoyable. It’s well produced, straightforward to assemble and gives you plenty of scope to make the finished scene your own.
I’ve built enough kits now to know that perfection is a rather elusive thing in this hobby. There is almost always something that needs adjusting, a component that doesn’t quite fit or an instruction that has you wondering what on earth the designer was thinking. This time, though, I had remarkably little to complain about.
Fifijoy, you’ve delivered a cracking little kit here, and you’ve made this particular builder very happy.
Now, if you’ll excuse me, I think I’ve earned a cocktail. And I know just the place to get one.
And now for the fun bit – the video.
And, here’s the pros and cons
Pros
- Excellent quality MDF with clean laser cutting and easy release of the components.
- Very straightforward construction, with parts fitting together without difficulty.
- Clear, well-illustrated 42-page instruction manual.
- Useful wiring diagrams and clearly identified electronic components.
- USB-powered lighting system, with colour-changing lamps and LED strips.
- An exceptionally generous supply of spare parts — more than I’ve encountered in any other kit.
- Plenty of scope for personalisation and customisation.
- A lovely tropical theme with plenty of character.
- A build that offers very little to complain about during construction.
Cons
- The touch sensor needs securing properly to prevent it moving out of position.
- The collars at step 82 would be easier to fit if the instructions followed the approach used at step 86.
- The supplied firepit LED is a steady yellow light rather than a flickering flame effect.
- The supplied boat wasn’t to my taste and was replaced.
- The flat printed drinks and figures offer limited opportunities for a more three-dimensional finish.
- Finding suitable 1:12 scale figures and accessories to populate the scene proved difficult.
- Some of the tiny acrylic pieces require considerable care when removing their protective film.
The gallery


Built and reviewed by: John A. MacInnes / Book Nook Workshop. October 2026.
Leave a Reply