Two Simple Customizations That Significantly Improve the Lemon Trees
One of the things I enjoy most about book nooks is looking for simple modifications that noticeably improve the final appearance without making the project significantly more difficult.
When building Sunset Isle by Rolife, two opportunities immediately caught my attention.
The first was the beautiful pergola covered with hanging lemon branches. The second was the small lemon tree standing in the front right corner of the model.
Neither modification was necessary—the original kit already looks excellent—but both proved to be surprisingly easy improvements with a much bigger visual impact than I originally expected.
This article describes both techniques.
Customization 1 – 3D Printed Lemons for the Pergola

The overhanging lemon branches are one of the dominant visual features of Sunset Isle.
Rolife represents the lemons using printed cardboard, which already looks quite good. However, because these branches are positioned directly above the viewer, I felt they deserved a little extra depth.
The Idea
Rather than replacing the entire branches, I decided to replace only the lemons.
Using my 3D printer, I designed and printed a collection of half lemons in several different sizes matching the printed artwork.
The natural yellow filament turned out to be almost the perfect lemon colour, so no painting was required.
The fine layer lines produced by the printer even resemble the slightly rough texture of real lemon skin, making the printed parts look surprisingly realistic.
Printing


I printed approximately thirty lemons in several sizes.
Using different sizes helped preserve the natural appearance of the branches, as real lemon trees never produce fruit of identical dimensions.
The lemons required almost no post-processing.
After removing the small printing supports and trimming the bases, they were ready for installation.
Installation
Each printed lemon was simply glued directly onto the corresponding printed fruit.


I concentrated most of the larger lemons towards the front of the pergola where they would be most visible.
Towards the rear I gradually reduced both their size and number, as these areas are naturally less noticeable.
The installation was surprisingly quick.
The Result

The improvement exceeded my expectations.
The branches gained genuine depth, the lighting produced realistic shadows between the lemons, and the entire pergola became one of the strongest visual features of the finished model.
For such a simple modification, the improvement is remarkable.
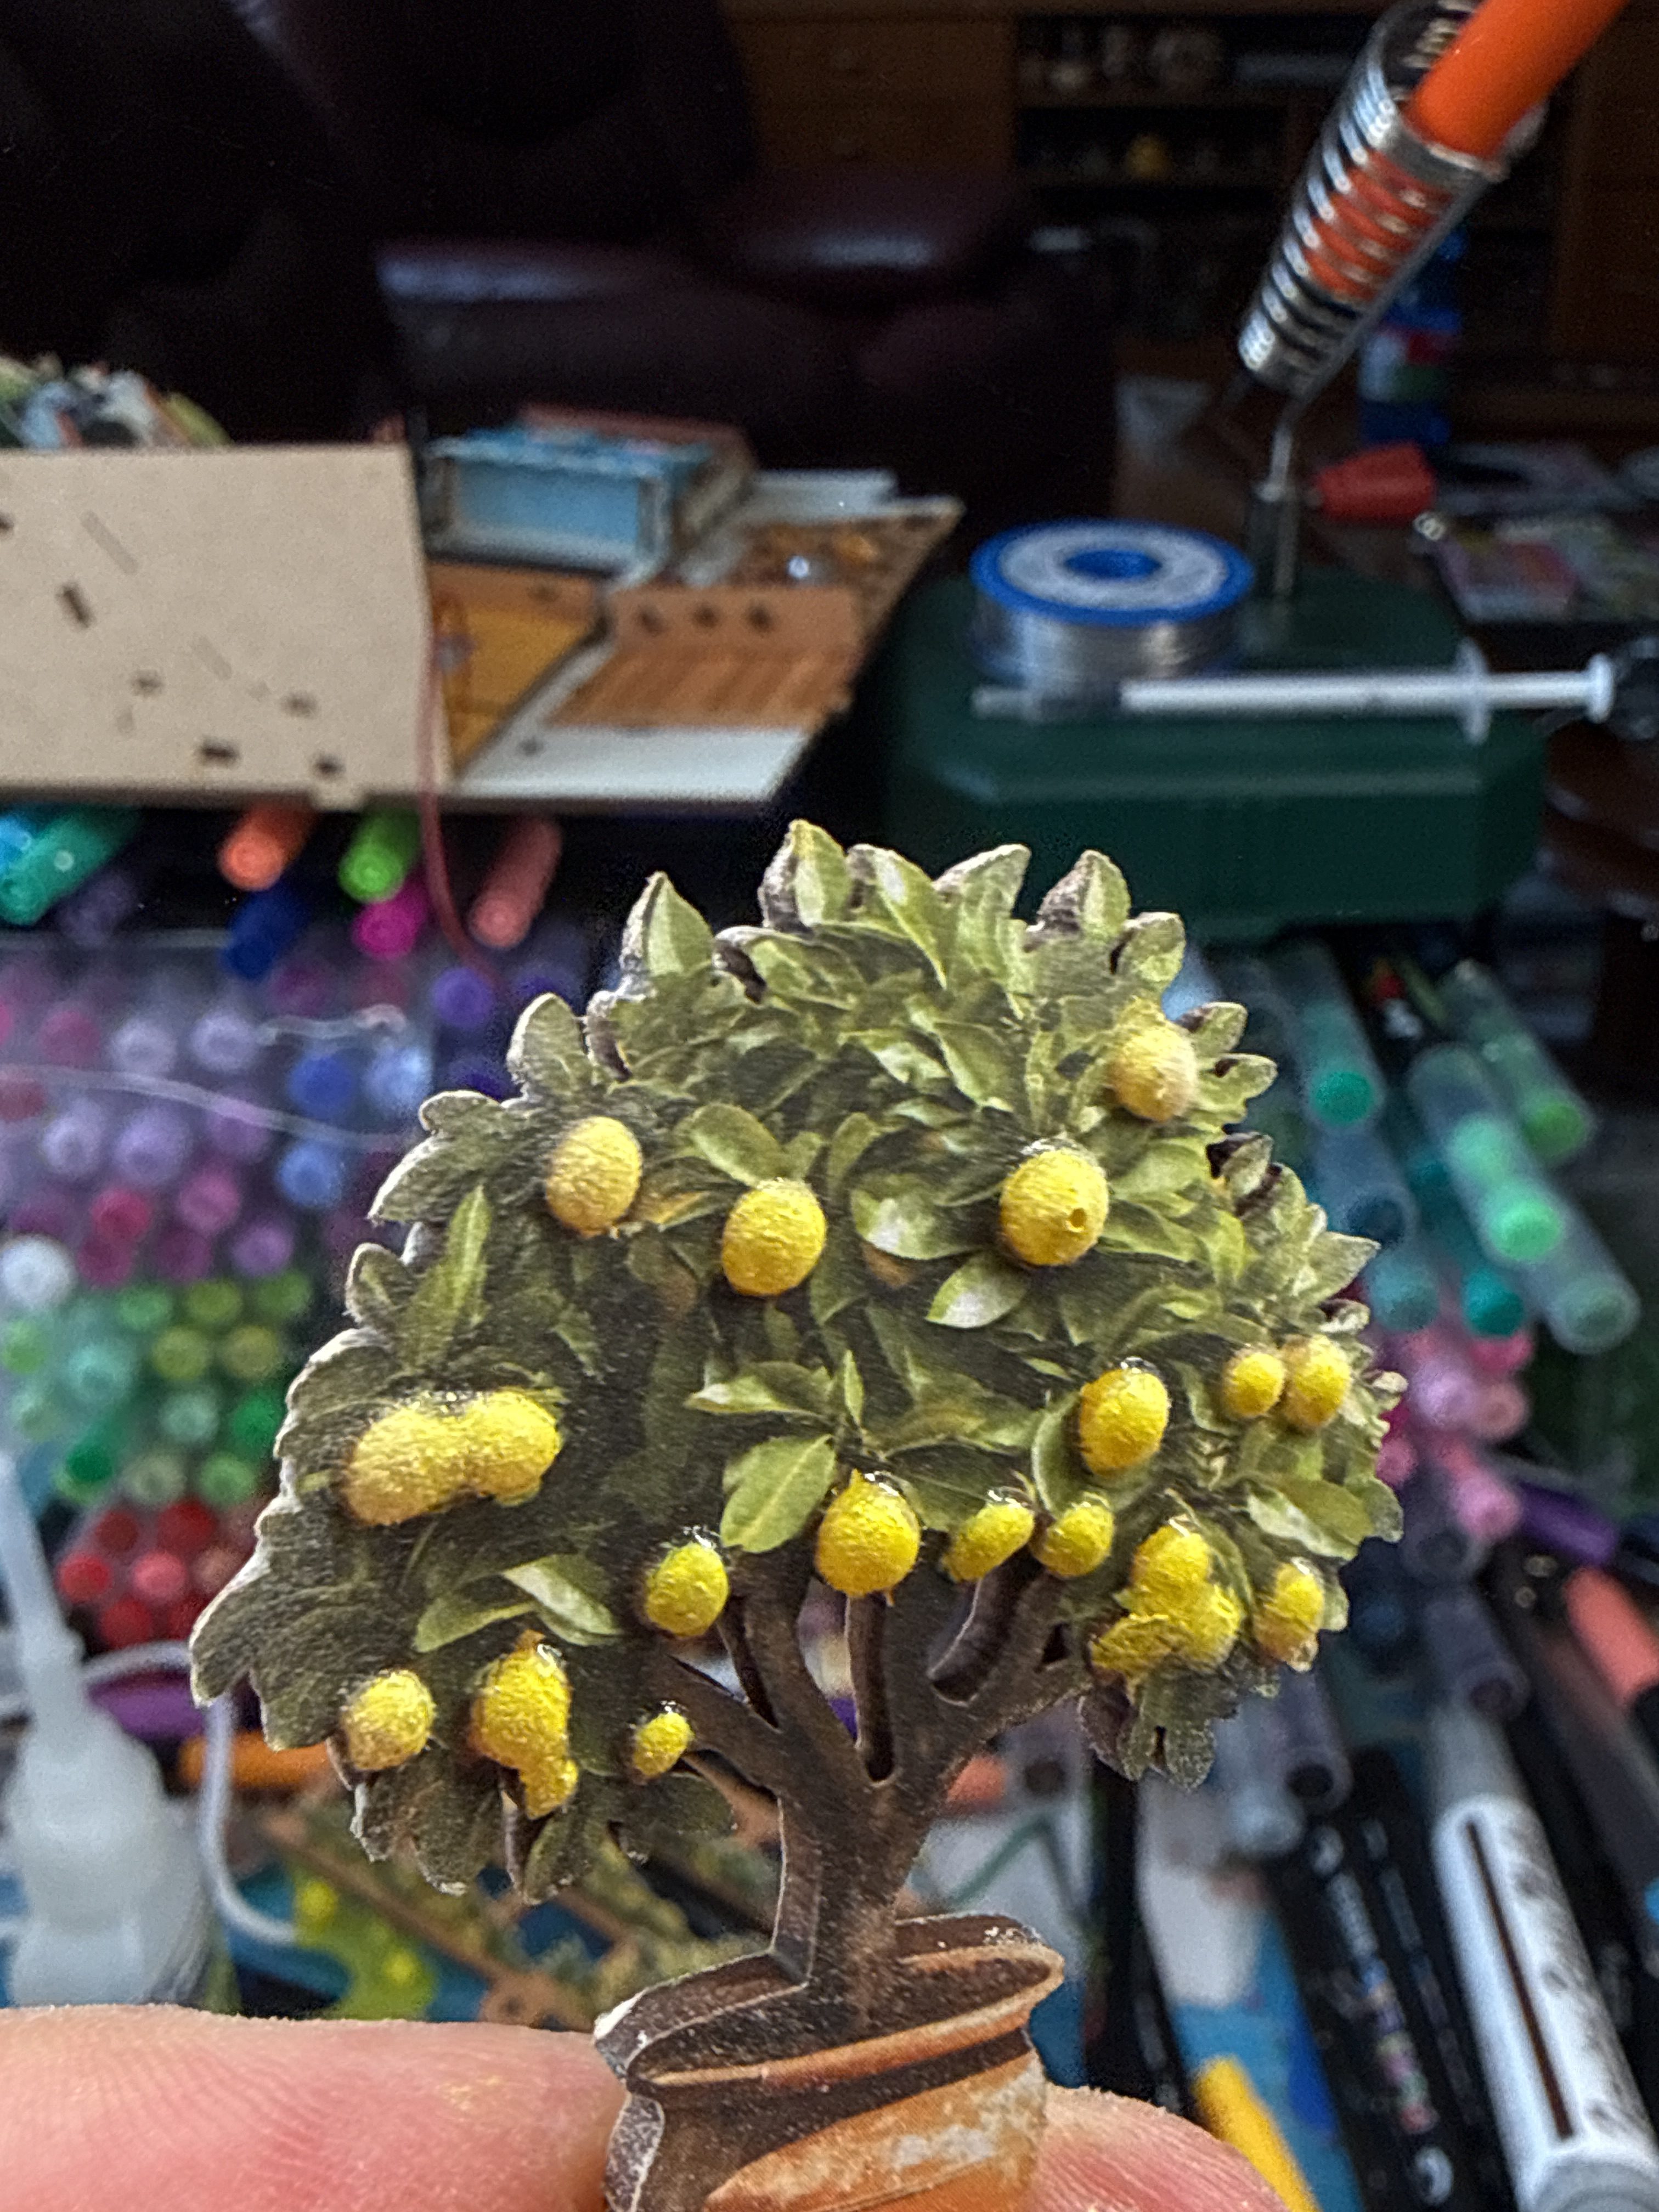
Customization 2 – Creating a 2.5D Lemon Tree
The small lemon tree in the front right corner presented a different challenge.
Although I briefly considered replacing it with a fully three-dimensional tree, I quickly realised that this would probably be a mistake.
The tree sits on the very front corner of the model, exactly where it would be most vulnerable during transport to exhibitions.
A delicate 3D tree would almost certainly be damaged sooner or later.
Instead, I decided to improve the original component.
Step 1 – Creating Raised Lemons

Using yellow UV resin, I placed small droplets directly over each printed lemon.
After curing the resin under UV light, every printed lemon became a small raised dome.
At this stage they looked far too glossy to resemble real fruit.
Step 2 – Painting
The cured resin was then painted using a lemon-yellow acrylic marker.
This removed the excessive shine while producing a much more natural, slightly matte finish.
The result is somewhere between a flat printed image and a fully three-dimensional object.
Perhaps the best description would be 2.5D.
Step 3 – Improving the Tree


The lemons were only part of the modification.
Using a rotary tool, I carefully thinned the rear edges of the plywood leaves.
This removed much of the visible dark laser-cut edge.
Afterwards I coloured the edges with a green acrylic marker so they blended naturally into the printed foliage.
I also rounded the trunk and branches using the rotary tool.
Although only a subtle change, it reduced the flat appearance of the plywood considerably.
Finally, I repainted the trunk using a dark brown acrylic marker.
Together these small improvements transformed the overall appearance of the tree.
Other Customizations
Although the lemon trees became the main focus of this project, I also made several additional modifications throughout the build.
These included:
- replacing the seagull with a 3D-printed version,
- adding a 3D-printed cat,
- replacing the supplied wooden rock with a real stone,
- adding realistic climbing vines,
- replacing selected paper greenery with artificial foliage.
Some of the original paper plants were left unchanged because they already looked perfectly convincing.
As always, my aim is not to replace everything, but to improve only those details where I believe the additional effort is worthwhile.
Final Thoughts
Neither of these modifications is essential.
Sunset Isle is already an excellent kit exactly as supplied by Rolife.
However, if you enjoy personalising your models, these two techniques are inexpensive, easy to perform, and require very little additional equipment.
The 3D-printed lemons add real depth to the pergola, while the UV resin technique provides an effective way to improve flat printed fruit without making the tree fragile.
Perhaps the biggest lesson from this project is that not every customization has to replace the original design. Sometimes simply enhancing what is already there produces the most practical and visually satisfying result.
Video Demonstration
I have also attached two short videos showing the complete process.
The first demonstrates the installation of the 3D-printed pergola lemons, while the second shows how I created the 2.5D UV resin lemons and refined the lemon tree using a rotary tool.
Watching the process makes both techniques much easier to understand than photographs alone, so I hope you’ll find them useful.
A small note before you go…
As you could probably see in the videos, my precision is far from perfect—and I hope you don’t mind that. My goal wasn’t to demonstrate a flawless technique, but simply to show the real process I used so you can see that these customizations are well within reach.
I’m actually quite confident that if you take your time and follow the process carefully, your results may very well be better than mine. Every builder develops their own techniques, and that’s one of the things I love most about this hobby.
If these videos inspire you to create your own lemon trees—or even to improve on my approach—then they’ve achieved exactly what I hoped for.
Most importantly, I’d love to see your own customizations and techniques. Please share them with the community. Every idea, every improvement, and every different approach helps all of us build even better book nooks the next time around.
Happy building!
Copyright Book Nook Workshop 2026 – All rights reserved. (Martin Seidler)

Leave a Reply