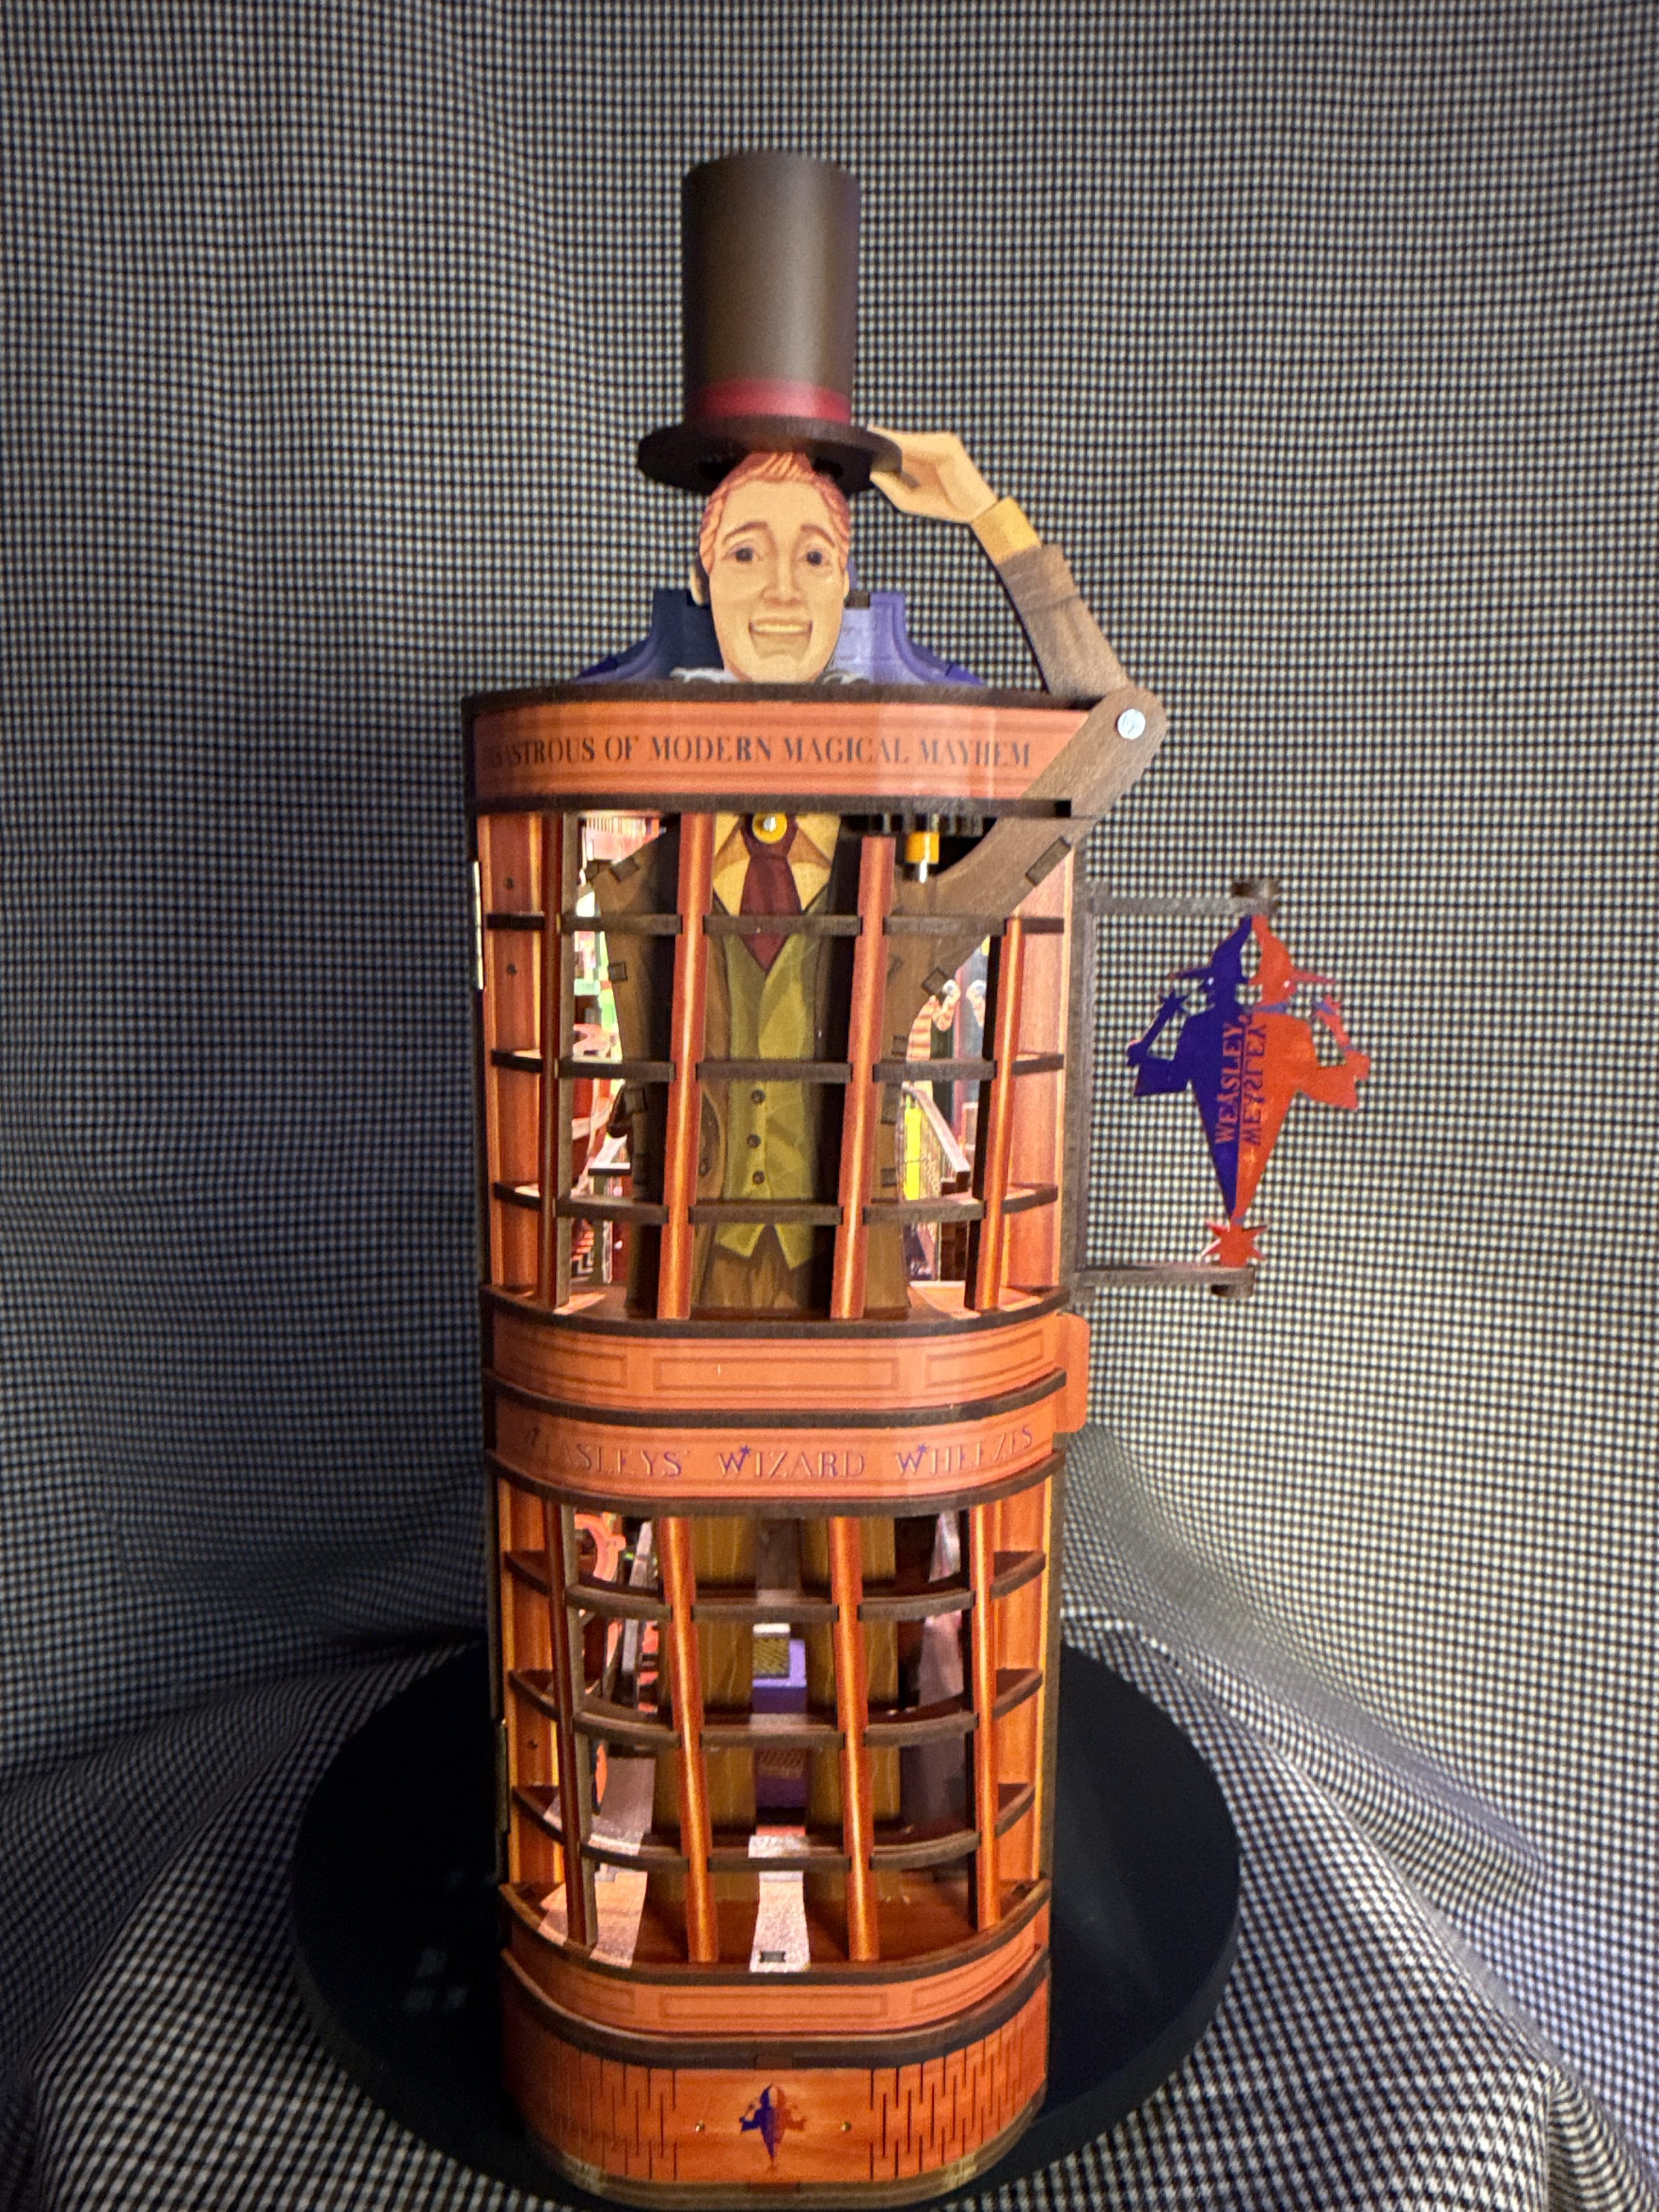
Build #63 | Built and reviewed by Martin Seidler | Intermediate to advanced | Overall rating 90/100
I built this one for a friend. Enchanted Tricks probably wouldn’t have been my first choice for my own shelf, but my friend is a huge Harry Potter fan. When Tonecheer offered the kit as a limited series of 500, available while stocks lasted, I knew exactly who should have the finished model.
The setting is Weasleys’ Wizard Wheezes, Fred and George Weasley’s joke shop in Diagon Alley. Harry, Ron and Hermione visit it in Harry Potter and the Half-Blood Prince. If you remember the curved orange shopfront and the giant figure lifting his top hat above the entrance, you’ll recognise the place before you even open the model. Tonecheer has given the gentleman a working arm and a little rabbit to hide under his hat. That last bit was always going to interest me, whatever I thought of the film. www.ewbankauctions.co.uk
Swing the front open and there are the twins in their matching suits, standing beneath a sign promising “Disastrous Delights for All Ages!” Upstairs you’ll find balloons marked with a W and a display selling Muggle magic tricks. Downstairs, just inside the entrance, there’s a distinctly green-looking character leaning over a bucket. It looks very much like the shop’s Puking Pastilles display. Of all the products Fred and George could have chosen to demonstrate by the front door, that certainly makes an impression. www.wbstudiotour.co.uk
What’s in the box?
By my count, there were about 11 MDF boards, a sheet of acrylic parts, clear acrylic covers for the side windows, a sticker sheet and some transparent film. The hardware includes screws, nuts, bolts, magnets, hinges, wire, metal axles and plastic washers. Tonecheer also supplies wax for the moving parts. Everything came neatly packed.


One thing I appreciate about Tonecheer is its attitude towards spares. There are extra screws, magnets and other small fittings, plus duplicates of many of the more delicate parts on the MDF boards. If you break a tiny piece, there’s a good chance you can reach for another. And if a screw drops on the floor, you can carry on building and leave its eventual discovery to the vacuum cleaner.
Excellent instructions, very positive fit
Between the shape of the model, its moving features and the way the manual is laid out, you can tell this is a Tonecheer kit. The instructions are excellent. Even when several gears, washers and an axle come together in one small space, the drawings make the order of assembly clear. Instructions get 10/10 from me.
Tonecheer also makes good use of poka-yoke, an engineering term for mistake-proofing. Here it’s as simple as changing the width and position of a tab and its matching slot. Two ends of a shelf may look much the same at first glance, but the part will usually tell you which way round it belongs. It’s a small design decision that saves a lot of head-scratching.
The precision of the components is excellent. The tightness of the fit is where I have a reservation. On my sample, quite a few joints needed long-nose pliers to squeeze them fully home. For others, I supported the assembly directly beneath the joint and used a small hammer to tap the piece into place. I used glue only in the few spots where the manual specifically called for it.
Those tight joints make for sturdy furniture once assembled. For a less experienced builder, though, it can be difficult to tell whether a tab needs another firm push or whether something is wrong. I’ve built enough Tonecheer kits to be comfortable making that call, and even I would have welcomed a little more clearance in places.
Building the shop, from the shelves to the gallery
The build starts with furnishing both side panels. Most of the shelves are straightforward, but keep an eye on the tall, narrow display racks. At this stage they look like ordinary pieces of shop furniture. Later, when you fit the small gear train underneath, you see how the merchandise displays rotate. I enjoyed that little piece of engineering.


The stairs deserve a mention simply because they went together without a fight. If you’ve ever spent an evening trying to persuade a succession of miniature steps to sit at the same angle, you’ll appreciate that as much as I did.
Next comes the upper gallery with its railings. One of its more unusual details is a figure balancing on a tightrope, represented by a length of wire. Downstairs, you furnish the lower level with stairs, cabinets and railings, install the electronics and fit the gallery into position. The lighting wires pass through the structure as it comes together. The manual shows the route clearly, and this part gave me no trouble.
The curved shopfront and the moving hat
The front door was the most interesting part of the build for me. It carries the two-storey curved shopfront, the glazing bars and the mechanism for the gentleman above the entrance. Several rounded sections establish the shape, with accordion-like pieces fitted between them and stickers applied over the surface. It’s slightly fiddly, but it produces that distinctive curve across both rows of windows.
Inside the door, MDF gears and cranks work on metal axles with plastic washers. The arrangement is simple enough that you can follow the movement through the mechanism and see how turning the crank makes the arm lift the hat. You also assemble the hat and its hidden rabbit. I like mechanisms like this. Once you’ve put one together yourself, watching it work is at least half the fun.


The curved and upright glazing bars finish the window frames. The supplied hinges and screws secure the completed door to the side panel, which then fits onto the main structure. Toward the end, you install the roof lighting, slide in the acrylic window covers, close the back and finish the roof. The hat clips onto the moving arm.


A tip about the door magnets. Tonecheer supplies two pairs, and you need one pair to hold the door closed. On my kit, one magnet was marked with a red line and its partner was unmarked. Use one of each. Before pressing them fully home, bring the door up to the frame and check that the two facing surfaces attract. Either magnet can go in the door. What matters is how they meet when you close it. If they repel, swap one for its opposite from the spare pair. It’s much easier to discover that while you can still get hold of it.
Lighting and electronics
There are three small LED boards. Two illuminate the shop from the ceiling, and the third lights the acrylic feature from below. The touch sensor cycles through three settings. The first tap switches on the overhead lights, the second selects the lower light, and the third brings everything on together.
The electronics are very good quality. Installation was straightforward, the touch control worked reliably, and I had no electrical problems during the build. My reservation is about how evenly the light reaches the interior. Even with all three boards on, some of the merchandise is much easier to see than the details elsewhere in the shop. That matters here because looking along the shelves for the twins’ latest piece of mischief is a large part of the appeal. Lighting and electronics earn 8.5/10.
Where it works best on a bookshelf
I’d put Enchanted Tricks at the right-hand end of a row of books, with a little clearance around the shop sign. From there you can open the front and look straight in at the twins, then look through the right-hand windows for another view of the stairs, gallery and displays.
Slide it tightly between two books and you lose that second view. There’s also a rotating sign on a projecting side arm, and it would be easy to catch it against a neighbouring book. I’d arrange the books first and put the Weasleys in last.
My gold-star ratings
| Category | Gold stars | Score | My comments |
|---|---|---|---|
| Instructions | ⭐⭐⭐⭐⭐⭐⭐⭐⭐⭐ | 10/10 | Clear drawings and a well-explained assembly sequence, especially for the gears and moving arm. |
| Realism and fidelity to the film | ⭐⭐⭐⭐⭐⭐⭐⭐⭐⭐ | 10/10 | From the hat above the entrance to the joke displays inside, the shop is immediately recognisable. |
| Lighting and electronics | ⭐⭐⭐⭐⭐⭐⭐⭐½ | 8.5/10 | Very good components, simple wiring and reliable touch control. The light could reach the interior more evenly. |
| Build friendliness | ⭐⭐⭐⭐⭐⭐⭐⭐ | 8/10 | Cleverly keyed parts and well-designed stairs. Several joints and closing steps need more force and patience than I’d expect of a beginner. |
| Overall verdict | ⭐⭐⭐⭐⭐⭐⭐⭐⭐ | 90/100 | A well-engineered interpretation of the Weasleys’ shop, with inventive moving features and a few practical compromises. |
The overall score reflects my experience of building and displaying the finished model.
Would I recommend Enchanted Tricks?
For a Harry Potter fan who loves the Weasley twins, I’d call this one a must-have. There’s plenty from the film to discover, and the moving hat and rotating displays give you a reason to take it off the shelf and show someone how it works. From conversations I’ve had with manufacturers, I expect we’ll see more Harry Potter and other film-themed miniatures in 2027. It’ll be interesting to see which scenes they choose.


For a beginner, I’d choose a different starting point. My recommendation is intermediate to advanced. The gear train is understandable, the wiring is simple and the instructions are among the kit’s strengths. It’s the combination of tight joints, small parts and a few awkward final assembly steps that pushes up the difficulty. Unless my particular sample was unusually tight, younger builders and anyone with limited hand strength will probably appreciate some help.
And do I like the style? Honestly, it still wouldn’t be my first choice for my own collection. Some of the displays make perfect sense once you know the joke behind them. Without that connection, the interior doesn’t have quite the same visual appeal for me. But I’m pleased I built it, and I’m even more pleased I built it for this particular friend. I had my fun figuring out how the gentleman lifts his hat. Now my friend gets to open the door and point out everything I missed.
My final rating for Tonecheer’s Enchanted Tricks is 90/100.
Leave a Reply