bult and written by Martin Seidler as the Build #58
Short review
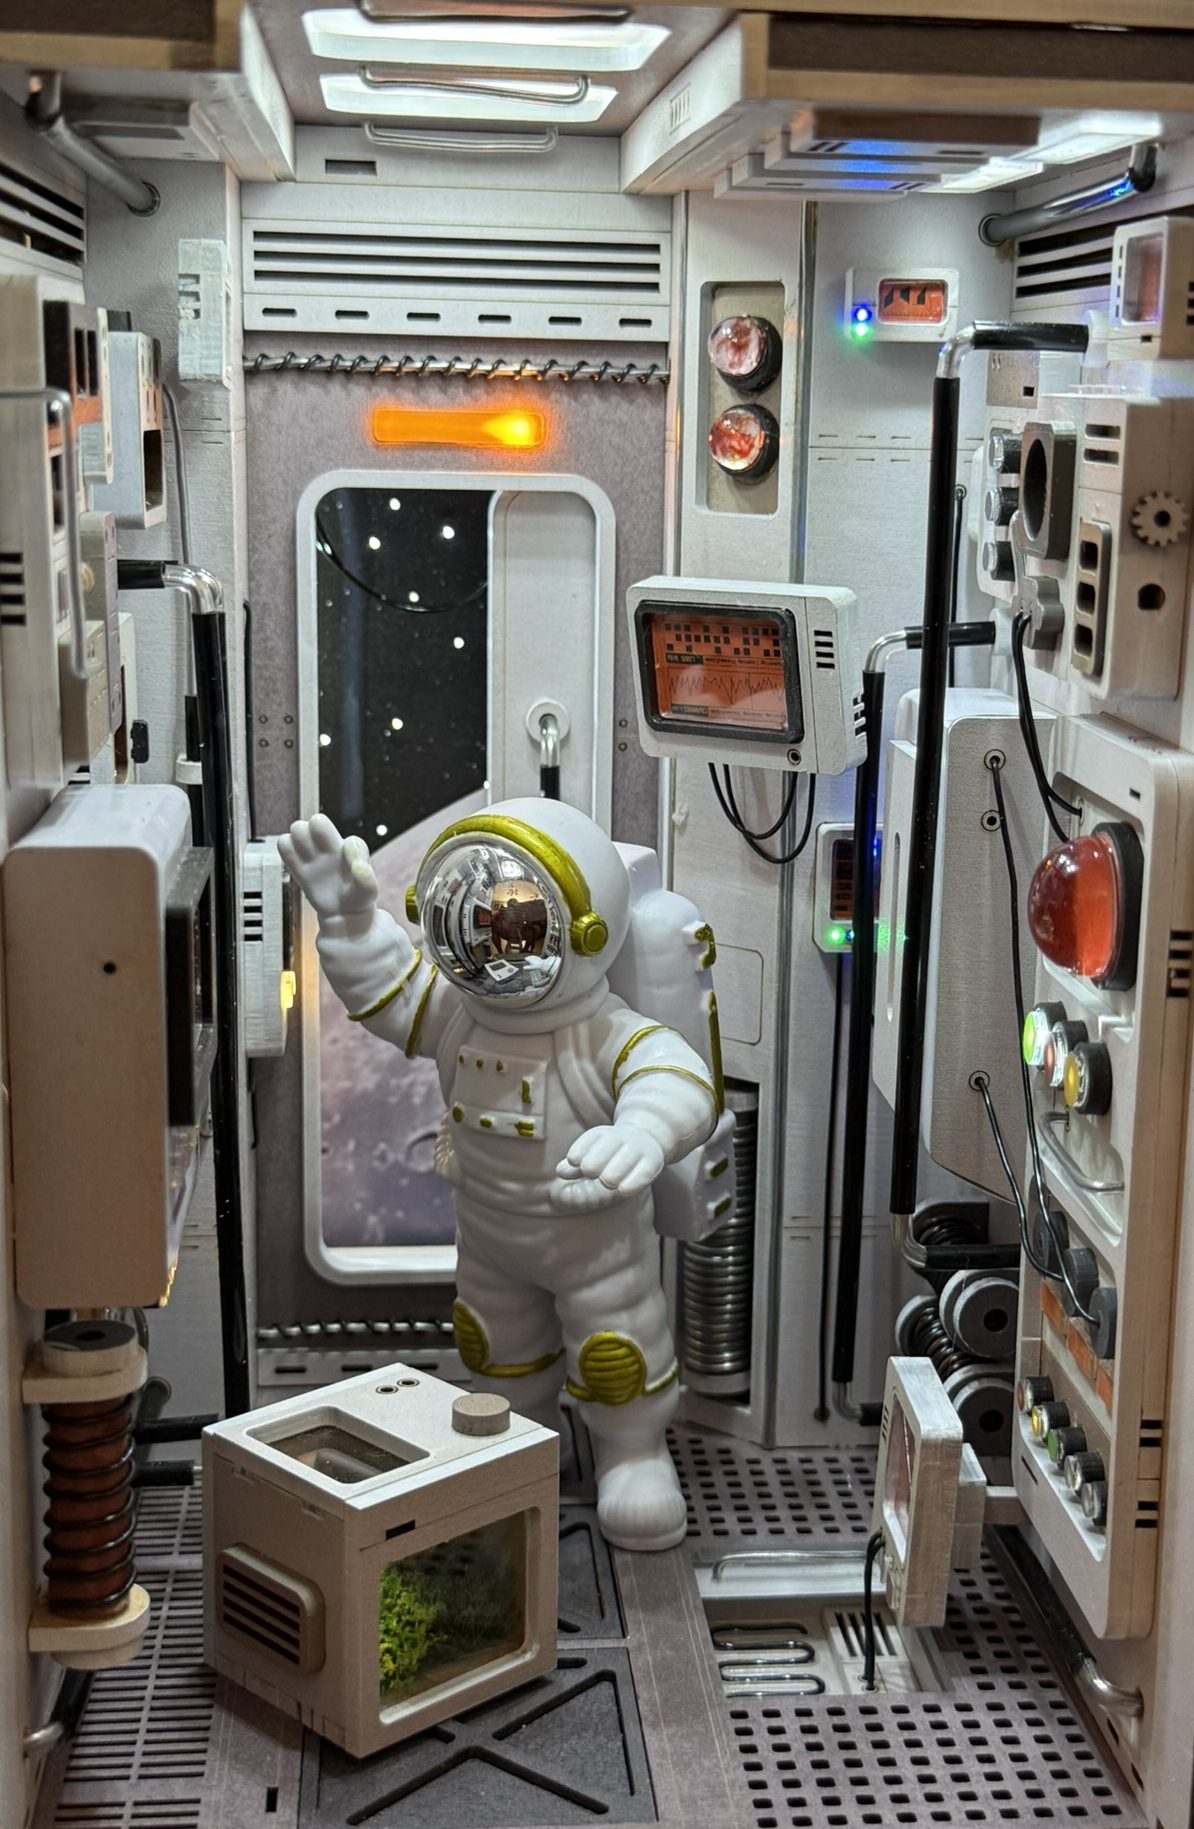
My first JOOHOUR build, and what an excellent introduction to the brand! Space Capsule puts a miniature orbital module on your bookshelf, complete with detailed control panels, a sliding rear door, a lunar view, a tiny greenhouse and its own astronaut.
The precision is outstanding, the acrylic parts are beautifully clear, and the instructions are excellent. I particularly liked the supplied white acrylic marker for edge painting, the USB/battery power options, and the touch switch with three lighting tones.
Of course, I couldn’t resist experimenting! Five extra LEDs now feed optical fibres that illuminate roughly 20–30 stars, buttons and indicators. The cold-white stars beyond the sliding door are my favourite detail. ✨The original overhead lighting already gives the kit a beautiful finish. The photos and video show the original lights, my additions, and both together.
The wraparound outer shell needs patience. The front dust cover also deserves a warning: its acrylic connecting tabs are fragile, and the completed cover can slip off. JOOHOUR supplies two spare pieces for each connector, but push the tabs through their slots gently. I would also secure the fitted cover with small pieces of double-sided tape along the rounded edges.
⭐ Overall: 90/100. A distinctive kit for space enthusiasts, science-fiction fans and anyone who enjoys a more technical miniature build.
Full review
This JOOHOUR Space Capsule review covers my build #58 and my first experience with the brand. After recently establishing a friendly connection with Ria and Joey, the people behind JOOHOUR, I was delighted to discover a distinctive kit with excellent materials, outstanding precision and some clever engineering.
The short verdict
A beautifully detailed space-themed book nook with excellent instructions, versatile lighting and an enjoyable mix of materials. The wraparound enclosure takes patience, and the attractive front dust cover has fragile connectors and needs securing. My fibre-optic additions were an experiment, not a necessary improvement. Overall: 90/100.
Ratings at a glance
| Category | Score | Golden stars |
|---|---|---|
| Instructions | 10/10 | ⭐⭐⭐⭐⭐⭐⭐⭐⭐⭐ |
| Design and engineering | 8.5/10 | ⭐⭐⭐⭐⭐⭐⭐⭐½ |
| Precision and fit | 10/10 | ⭐⭐⭐⭐⭐⭐⭐⭐⭐⭐ |
| Material quality | 10/10 | ⭐⭐⭐⭐⭐⭐⭐⭐⭐⭐ |
| Ease of assembly | 9/10 | ⭐⭐⭐⭐⭐⭐⭐⭐⭐ |
| Customization potential | 5/10 | ⭐⭐⭐⭐⭐ |
| Overall verdict | 90/100 | Excellent |
The overall verdict reflects my assessment of the complete kit; it is not an arithmetic average of the category scores.
First impressions and what’s in the box
Space Capsule depicts an orbital module packed with instruments, controls and space-themed details. A sliding rear door reveals a lunar horizon, while a small greenhouse and an astronaut add life to the technical interior. As an aerospace engineer, I found the subject immediately appealing.
Inside the box, three smaller accessory boxes sit alongside the instructions and flat components. Unpacking everything reveals:
- 14 MDF parts panels.
- Clear acrylic components, a front dust cover and frosted lighting panels.
- A preassembled lighting set with touch control, USB connection and battery box.
- A white acrylic marker for painting selected edges.
- Several types of aluminium wire, stickers and decorative accessories.
- A white astronaut figure and planting materials for the miniature greenhouse.


The marker is a thoughtful inclusion. In this kit, painting selected edges is part of the intended build, and the manual identifies where to do it.
Instructions, materials and precision
The instructions deserve 10/10. The sequence is clear, and the different materials make the work interesting without making it confusing.
Laser cutting is excellent. Narrow retaining bridges leave little to clean up, although parts can come loose easily. Handle the panels carefully; identification marks on many components help if something detaches unexpectedly.
The acrylics are equally impressive: clear, clean and free from the fogging that can spoil illuminated details. Throughout the interior, parts fitted together beautifully.
Construction is mix of tab – slot design and glued assembly steps. Together with creating the wire details, stickers, acrylics, edge painting it make the build very enjoyable.
The build: four main stages
1. Base, rear structure and sliding door
The build starts with the floor and supporting rear structure. This includes the lunar backdrop and sliding door, which operates through a lever accessible from behind the finished kit.
2. Right control panel
MDF, acrylic, stickers and glass hemispheres create a convincing collection of instruments. Wire forms cables, handles and railings, while wire-wrapped cylinders add technical detail.
The supplied wires include approximately 0.5 mm black enamelled wire and thicker 1.5 mm and 2.5 mm coated aluminium wire. Some details combine the thicker wire with black tubing—an unusual and enjoyable modelling technique.
3. Left control panel
The opposite side follows a similar approach, with displays, controls and more small fittings. This combination of assembly, shaping wire and painting edges gives the kit its distinctive character.
4. Lighting, enclosure and finishing
Next come the ceiling, frosted light panels, LED strip and power components. The outer shell then wraps around the supporting structure through closely fitting tabs and slots.
This was the least forgiving part of the standard build. The tolerances are tight, so test-fit carefully. Light sanding or careful trimming of the mating edges made assembly much easier.
The final touches are the greenhouse, astronaut and front dust cover. This cover combines an acrylic front panel with an MDF frame. Small acrylic connectors join the two and also fit into slots in the main body. The result looks elegant, but the connectors are fragile: push them through the slots gently to avoid breaking their tabs. JOOHOUR includes two spare pieces for each connector, although careless assembly could use those up quickly.
The fitted cover does not hold securely in place on my build. Consider a little double-sided tape along the rounded edges, or another unobtrusive fixing, to keep it from falling off and breaking. This is the main practical weakness of an otherwise attractive design.


Original lighting and electronics
The supplied lighting is already excellent. Frosted ceiling panels distribute the light, and the preassembled system offers both USB and battery power.
A finished touch switch sits behind a cutout in the rear panel. It feels more substantial than the simple touch pads common in many kits. It also lets you choose cool white, warm white or a combination of both.
There is no need to modify this system to achieve an attractive result.


My customization: fibre-optic stars and controls
The lunar backdrop gave me an idea: could I make its stars actually shine? I used inexpensive optical fibre sold for decorative lighting, mainly 0.5 mm fibre for the stars and tiny panel details.
After drilling small holes, I gathered roughly 12–15 star fibres around one cold-white LED. Larger 1.5 mm fibres illuminated selected transparent acrylic buttons, with blue and green LEDs adding colour to other controls.


Altogether, five additional LEDs illuminate roughly 20–30 individual points. Bringing the fibres together into compact bundles took experimentation, but the glowing stars are particularly convincing.
I also replaced the original USB connection with a USB-C socket and added an adjustable buck converter. Around 3 V gave the brightness I wanted in my particular additional LED circuit. My custom lights looked brighter on USB power than on batteries.
Fixing the fibres with UV resin introduced a complication. In my build, prolonged curing exposure left some fibres brittle, and two broke and needed replacing. Resin buildup behind the star panel also reduced clearance and made final assembly harder.
Those difficulties came from my modifications. The kit itself does not require fibre optics, extra LEDs or a converter.
I kept the astronaut mostly white, adding only a few metallic-gold details. The photos and video compare the unlit model, original lighting, custom lighting and both systems together.
Difficulty and customization potential
I would recommend Space Capsule primarily to intermediate builders. A patient beginner with practical modelling skills could certainly manage it, but shaping wire, handling acrylics, fitting the enclosure and mounting the dust cover demand some care. I rate ease of assembly 9/10; the wraparound shell and dust cover account for the deduction.
My lighting experiments added considerable work, so my own build time would not fairly represent the standard kit.
Customization potential earns 5/10. There are opportunities to paint the astronaut and alter the lighting, but limited room for extensive additions. The supplied design is already so complete that it does not call for much more.
What I liked—and what could improve
Highlights: outstanding precision, premium acrylics, excellent instructions, intentional edge painting, interesting wire details, versatile lighting and an included astronaut. The dust cover looks good, too.
Main improvements: a more forgiving fit for the wraparound enclosure and a sturdier way of fastening the dust cover. Its acrylic tabs break easily, and the cover can slip off unless secured.
JOOHOUR Space Capsule review: final verdict
My first JOOHOUR build was an excellent experience. Space Capsule combines a distinctive subject with quality materials and satisfying technical detail. At the Amazon price I checked, I considered the value excellent.
If you enjoy space, engineering or science fiction, this kit belongs on your shortlist. Build it as supplied for a beautiful display, or use it as a starting point for your own experiments.
90/100—and I am already looking forward to my next JOOHOUR build.
Gallery


Leave a Reply