Built & reviewed by David Richards
There are book nooks that look like miniature libraries. There are book nooks that recreate streets, shops and fantasy worlds. There are mechanical wooden models full of gears and moving parts.
And then there is Heartbrook by Viendor, which somehow manages to be all three.

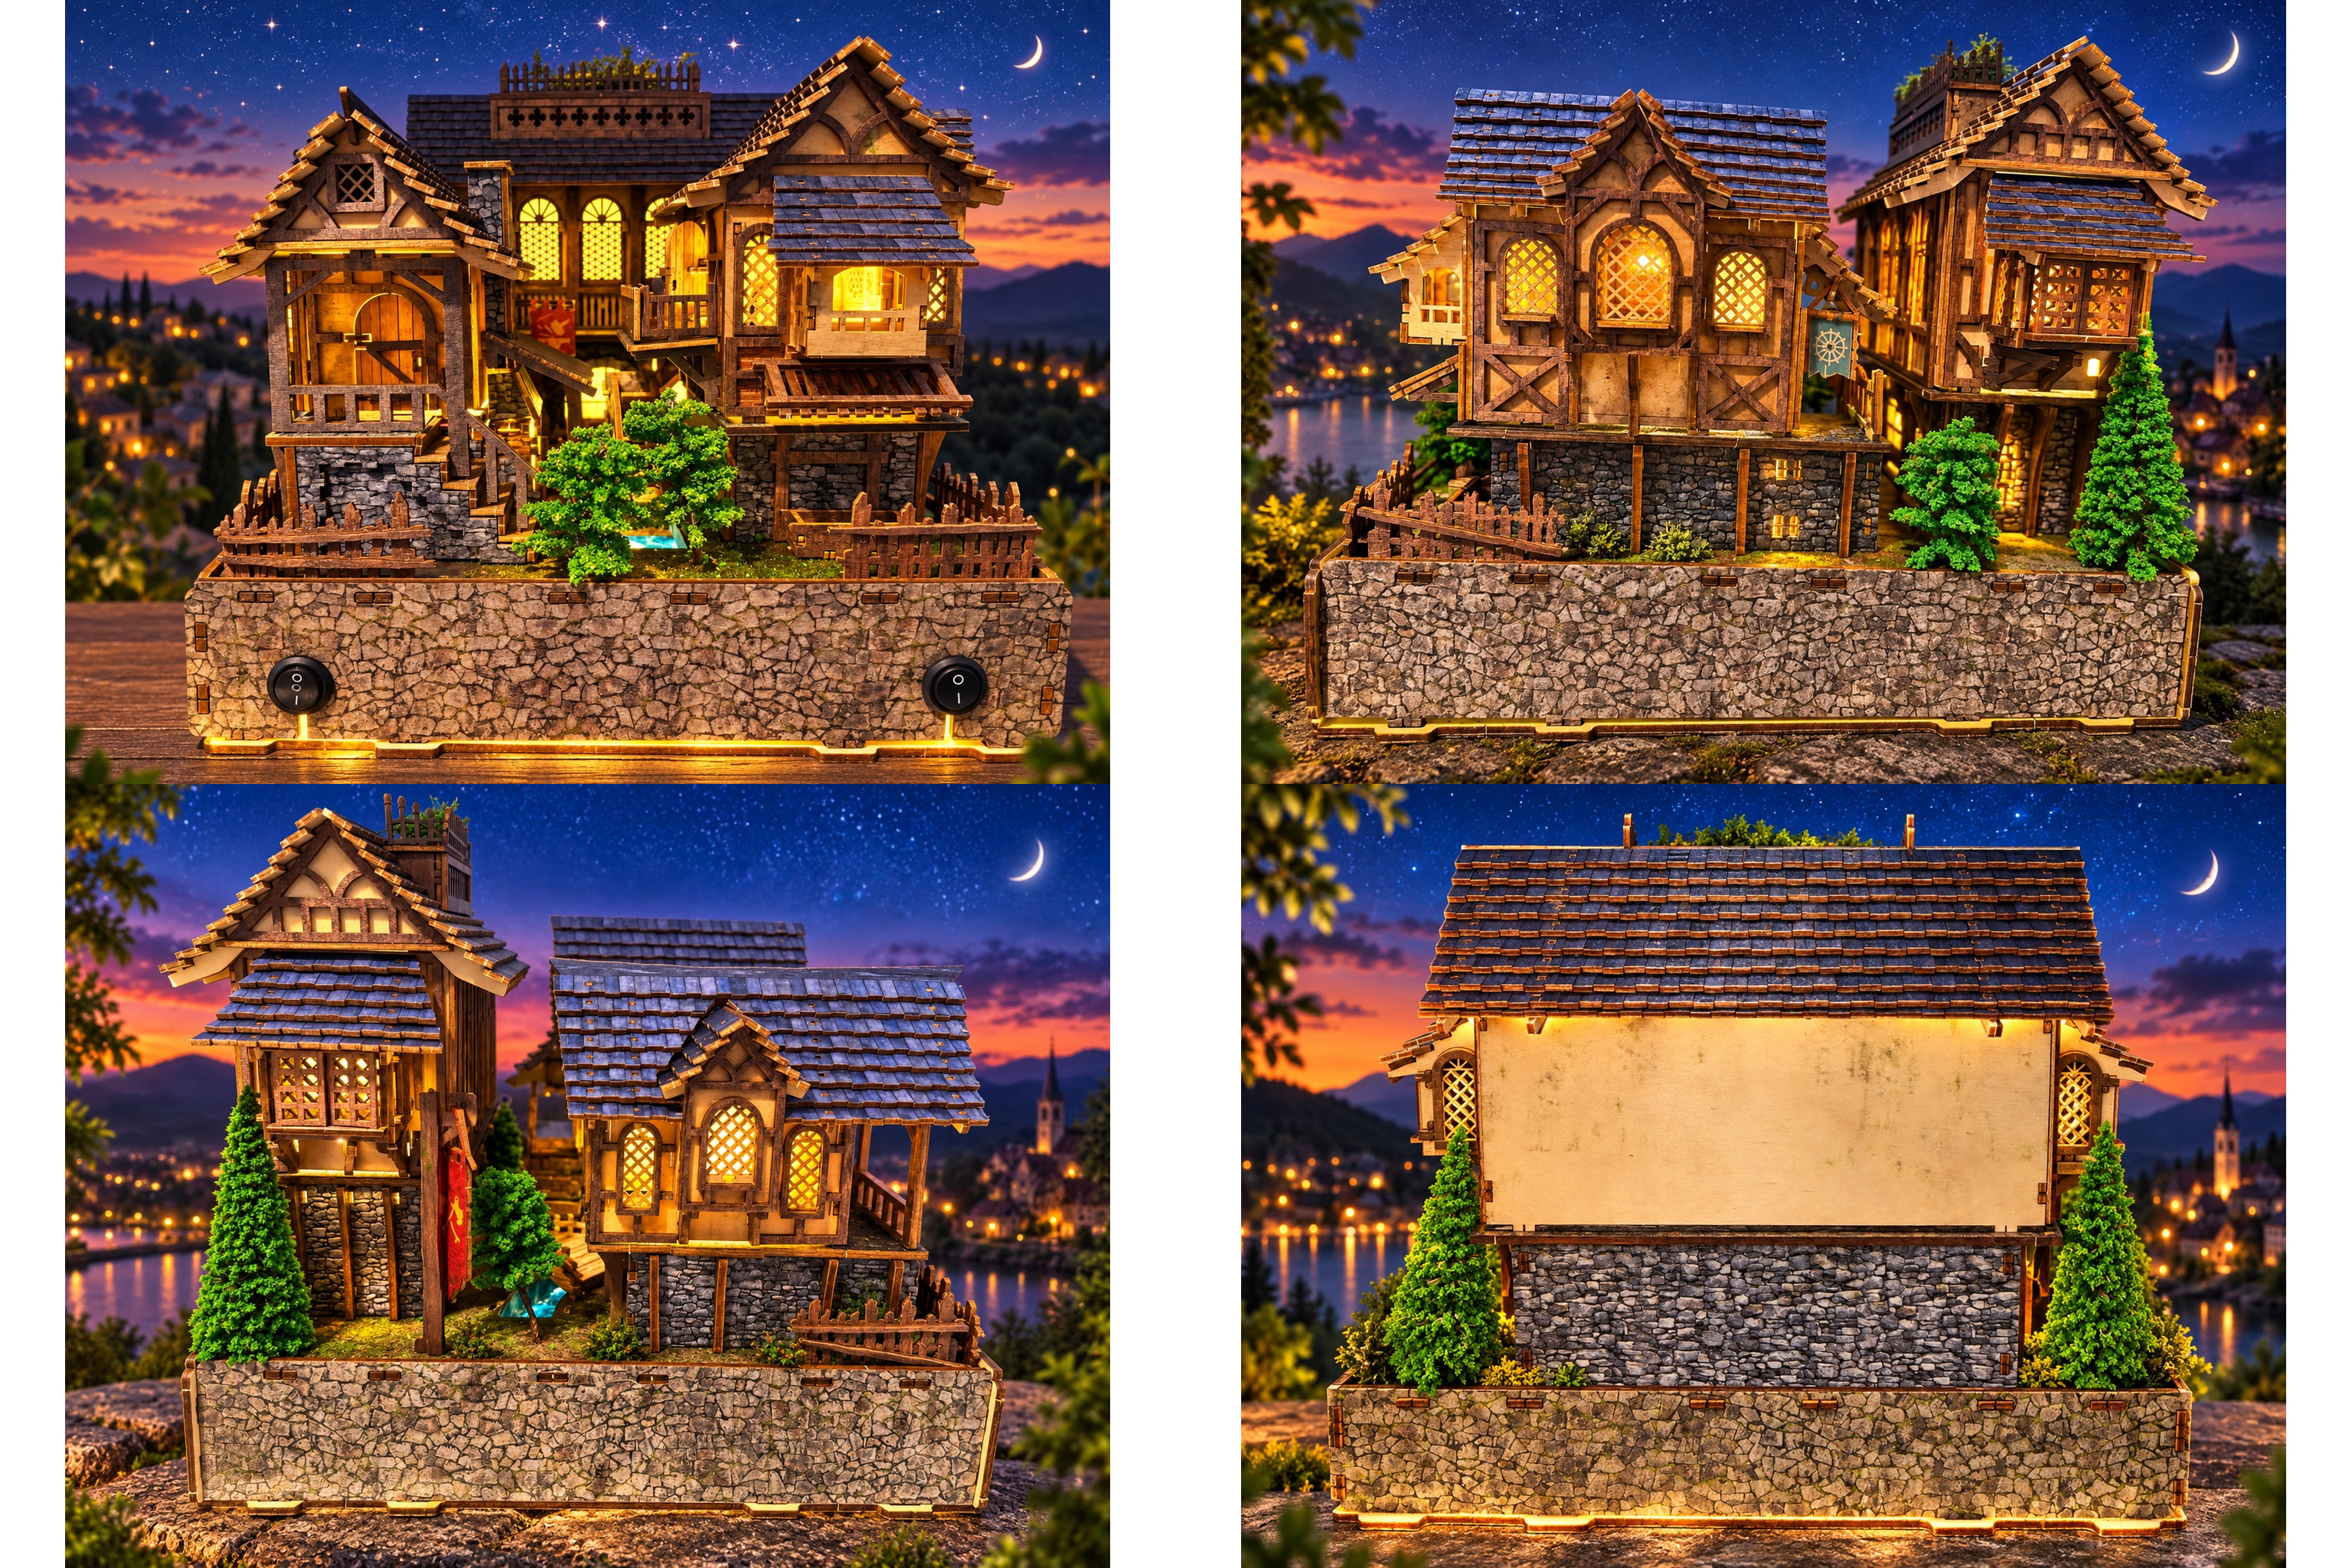
Heartbrook depicts an old European fantasy village built around a working water-powered forge. Blue-roofed houses rise above an illuminated stream, a waterwheel turns alongside the buildings, trees and fences complete the landscape, and the entire model feels less like a conventional book nook than a miniature world that happens to fit on a shelf.
Viendor describes a misty valley where a water-mill-powered forge once produced weapons to resist a darkness from the North, with the blue-roofed houses becoming symbols of hope and craftsmanship. The story is deliberately unfinished, leaving the builder to imagine what happens next
The Images that inspired Viendor


It is a lovely premise.
But what really interested me was something else.
Is Heartbrook a glimpse of where book nooks are heading next?
What’s in the Heartbrook Kit?

Opening the box immediately tells you that Heartbrook is rather different from many modern book nooks.
The kit contains:
- 12 plywood boards
- an acrylic sheet
- motor kit
- LED strings
- six model trees
The first thing that struck me was simply the weight of the package. It is substantial.
The second was the instruction manual.
I have built a lot of kits, and this is quite simply one of the most impressive instruction manuals I have encountered. The step-by-step illustrations are exceptionally clear and, crucially, show what the model should look like after each stage.
That becomes important because Heartbrook is not a particularly forgiving kit.
Plywood Changes the Build Completely
Most of the book nooks I build today use MDF, but Heartbrook’s wooden components are plywood.
That sounds like a relatively minor distinction.
It isn’t.
Plywood behaves very differently.
The parts can be surprisingly fragile and splinter quite easily when removed from the boards. I treated the whole thing like a baby because I was determined not to break anything.
There is also considerably more sanding than with a good modern MDF kit. In fact, the amount of sanding can substantially increase the overall build time.
On the other hand, plywood has more flexibility than MDF. Pieces often slot together relatively easily, but that flexibility means they can loosen again while you continue working on a building.
My approach quickly became:
dry fit first, establish exactly where everything belongs, then reach for the trusty B-7000.
That worked extremely well.
Building the Water Forge, Motor and Stream


This is where Heartbrook begins to reveal what makes it special.
Rather than simply constructing buildings around a few LEDs, you are building an actual mechanical system beneath the village.
The first stage involves constructing the main gear driven by the motor and installing the battery compartments.
One pleasant surprise is that, unlike some other mechanical wooden models I have built, there is no need to wax the gears.
Then come the LEDs beneath the acrylic stream.
Ironically, considering how impressed I was with the instruction manual, this was the one point where I struggled to understand exactly where the LEDs were supposed to go.
Even after completing the model and looking back at the manual, I’m still not entirely sure I put them exactly where Viendor intended.
But they worked!
Naturally, I discovered the pieces I probably needed at the very last stage of the build, when retrofitting them was no longer practical. Sometimes you just have to accept victory where you find it.
Welcome to the Wiring Department

There are a lot of wires underneath Heartbrook.
This is definitely not a stage for rushing.
Before closing anything up, make absolutely certain you know which wire goes where and follow the instructions carefully.
Then comes what I found to be the hardest part of the entire build.
The Moment Heartbrook Nearly Broke Me
The base has to be fitted onto the acrylic sheet while simultaneously locating more than ten pillars into their respective slots.
That sentence makes the job sound considerably easier than it actually is.
It took a lot of time.
And a lot of patience.
You get one pillar lined up and another decides it doesn’t want to cooperate. Move that one and something else shifts.
Fortunately, it is possible to get a thin object between the sections and gently persuade individual pillars into position.
Eventually everything engaged.
The sense of relief was enormous.
Anyone who builds complicated miniatures will know that feeling. You don’t necessarily celebrate.
You just stare at it for a few seconds thinking:
Thank goodness for that.
Then There Is the Waterwheel
One component alone took me about an hour.
The waterwheel.
Some of that was admittedly user error, but the photograph in the instructions was also rather dark.
There is one particularly important detail worth knowing if you build Heartbrook.
The wheel with the two holes in its centre must be positioned so those holes are parallel with one of the cross lines. Get that wrong and you won’t be able to insert the shaft.
When connecting the horizontal gear to the vertical gear, also make sure the cogs are fully engaged. Everything needs to be pushed firmly into position.
Then switch on the motor and test it.
Watching the wheel turn for the first time is one of those wonderfully satisfying moments that mechanical kits provide.
Building the Village

After the mechanical work beneath Heartbrook, construction of the buildings themselves feels comparatively straightforward.
Again, I recommend dry fitting before gluing.
Also completely untangle the LED strips before installing them. You want every bit of available length.
The instructions show the lighting arranged in a wonderfully neat rectangular shape.
How you’re actually supposed to achieve quite such a perfect rectangle is another matter. 😂
Fortunately, it doesn’t really matter once everything is assembled.
The three bases for the main buildings are constructed first, followed by the sides. The switches are fed through during this process.
And a small point worth mentioning: these are conventional click on/off switches.
There are no touch or PIR sensors here.
Personally, I have no problem with that. Sometimes a simple physical switch is exactly what you want.
Those Blue Roofs
The upper buildings continue in much the same fashion and are relatively straightforward to construct.
But visually, this is where Heartbrook really begins coming alive.
The blue roof tiles are excellent.
They create much of the character of the finished village and contrast beautifully with the warmer wooden buildings and greenery.
I would definitely recommend using a few small dabs of glue to keep the roof pieces secure.
Also, don’t casually mix the tiles together. They need to be installed in the correct sequence.
On the main building with the roof balcony, I decided to add some of my own greenery.
It is a small modification, but Heartbrook is exactly the sort of model that invites personalisation. A little extra foliage doesn’t look like an addition; it looks as though it was always meant to be there.
Bringing Heartbrook Together

Placing the completed buildings onto their bases requires another bout of careful alignment.
This is one of those occasions where looking at the model from one direction isn’t enough.
I found myself rotating the entire model through 360 degrees, checking every side to make sure everything had engaged correctly.
The same process is repeated for all three buildings and, once I understood what was required, I encountered no significant problems.
Finally, the outdoor furniture, fences and trees are added.
And suddenly the collection of plywood, gears, wires, acrylic and LEDs has become a village.
Is Heartbrook Actually a Book Nook?

This is perhaps the most interesting question.
Technically, yes.
But describing Heartbrook simply as a book nook doesn’t really do it justice.
It is part book nook, part diorama, part mechanical model and part something else that is surprisingly difficult to define.
And that is exactly why I find it so interesting.
I recently wrote about whether book nooks might increasingly move away from endless fictional libraries and towards recognisable places, architectural scenes and more ambitious miniature environments.
Heartbrook reinforces that feeling.
It doesn’t rely on rows of miniature books to tell us what it is.
It creates a place.
The buildings have architecture. The stream provides movement and light. The waterwheel gives the model life. The trees and fences extend the scene beyond the structures themselves.
It feels like a tiny landscape rather than simply a decorated box.
Is Heartbrook Difficult to Build?
Yes — but not necessarily for the reasons you might expect.
The individual construction stages are generally understandable, helped enormously by that excellent instruction manual.
The difficulty comes from the combination of:
fragile plywood + mechanical components + wiring + precise alignment.
This is therefore not the kit I would recommend as somebody’s first book nook.
An experienced builder, however, should find it enormously rewarding.
There is also one tool you can safely leave in the drawer.
Your tiny hammer.
With plywood this fragile, this is definitely not the kit to start whacking into submission.
One Slightly Noisy Elephant in the Village…
There is one thing you should know about that lovely moving waterwheel.
The water forge is noisy when it turns.
You are going to hear the mechanism.
Personally, I can forgive that. The movement is a feature to enjoy occasionally rather than something I would necessarily leave running continuously.
But if silent mechanical operation is important to you, it is worth knowing before you build it.
Final Verdict – Heartbrook by Viendor
Heartbrook is an amazing kit.
It challenged me in places, demanded considerably more sanding than an MDF kit, made me question the positioning of LEDs, consumed an hour of my life with one waterwheel and produced one particularly memorable battle involving ten-plus pillars and an acrylic base.
But look at what you get at the end.
A multi-level European fantasy village.
An illuminated stream.
A working waterwheel.
Mechanical gears.
Detailed blue-roofed buildings.
Landscaping.
And a model that feels genuinely different from almost anything else on the shelf.
Perhaps my biggest achievement was considerably simpler:
I didn’t break a single piece.
Given the fragility of the plywood, that produced almost as much satisfaction as finishing the model itself.
Heartbrook is not a beginner’s kit. I would recommend it for an experienced builder who enjoys detailed construction and doesn’t mind taking things slowly.
But it also leaves me thinking about the future.
If book nooks continue evolving towards larger scenes, moving elements, real or imagined architecture and increasingly elaborate dioramas, Heartbrook may turn out to be less of an oddity and more of a sign of things to come.
And after finishing it?
There is probably no better endorsement I can give Viendor than the final sentence in my build notes:
I cannot wait to build my next Viendor kit.


Leave a Reply