Build #35
Built & Reviewed by Martin Seidler
Introduction
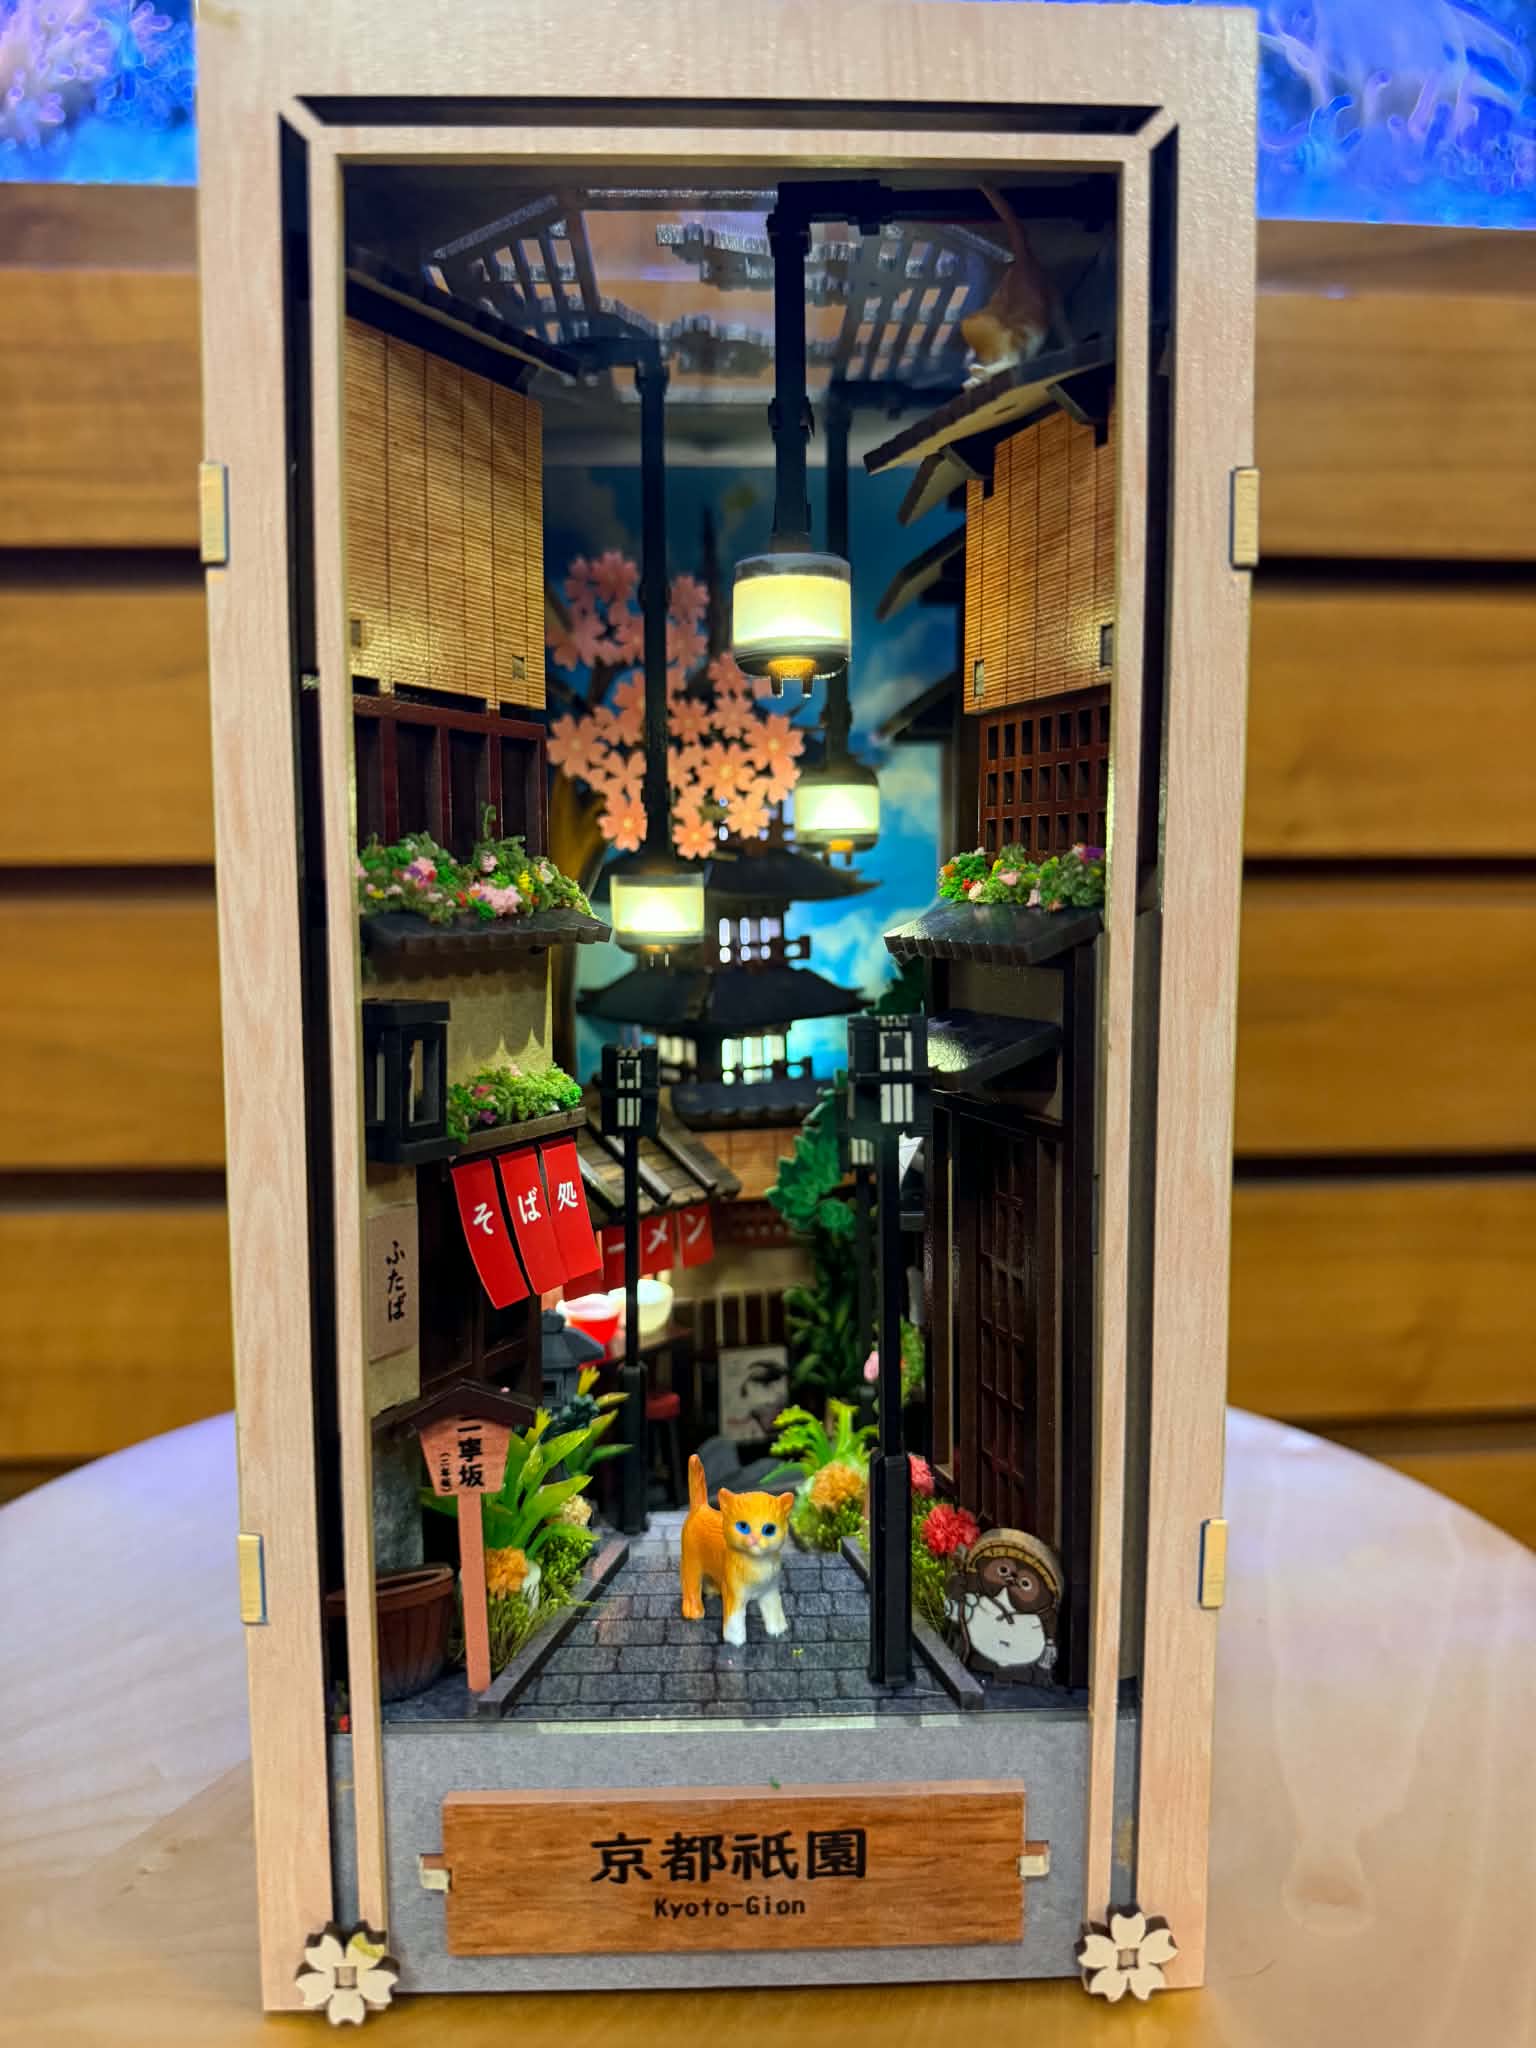
This time I built Kyoto Gion from Anavrin, one of their best-selling book nook kits and also one of the easiest kits in their portfolio.
The scene represents the famous Hōkan-ji Walkway in Kyoto’s Gion district, with traditional Japanese houses, street lanterns, and the iconic pagoda rising in the background. The goal is clearly to recreate a specific location and atmosphere rather than creating a fantasy scene, and I think it does that quite well.
As with most Anavrin kits, the first thing you notice is the quality.
First Impressions
The kit is made from standard MDF sheets, translucent paper for the windows, several plastic parts, and a handful of three-dimensional accessories including a cat, teapots, plants, and other decorative items.
Printing quality is excellent. Colors are sharp, parts fit together precisely, and everything feels very well manufactured.
The biggest weakness of this kit is not the design, the instructions, or the quality.
It is the price.
This is the same criticism I have for virtually all Anavrin kits. Comparable book nooks from other manufacturers often cost half as much, and sometimes even less. In many cases Anavrin kits cost two to three times more than competing products of similar size and complexity.
The quality is excellent and nobody can deny that, but personally I still consider their pricing completely out of line with the rest of the market. In fact, this was one of the main reasons why I stopped buying Anavrin kits myself.
That said, if you are willing to pay the premium, you will almost certainly not be disappointed by the quality.
What’s Inside the Box?
The kit contains:


- MDF sheets
- Pre-wired lighting system
- Translucent window paper
- Plastic decorative accessories
- Printed decorative elements
- Full-color instruction manual
The lighting system consists of five pre-wired lighting sections.
One thing I really liked is that the wire lengths naturally guide you toward the correct installation order. As soon as you start installing the first lights, it becomes obvious which wire belongs where, making mistakes much less likely later in the build.
The Build Process
Construction starts with the floor and side walls before gradually building up the street scene itself.
The assembly follows Anavrin’s typical philosophy of extensive tab-and-slot construction. Personally, I have mixed feelings about this. There are places where a simple glued joint would actually be easier and more practical, but builders who dislike glue will probably appreciate the approach.
The fit of the parts is excellent throughout the build.
Some decorative umbrellas are created using supplied stickers, while the buildings themselves quickly come together thanks to the precise fit of the components.
The most complicated section is probably the pagoda at the rear of the scene. It features multiple roof layers that require some care during assembly. However, if you follow the instructions carefully, there is nothing particularly difficult about it.
Overall, this is definitely one of the easiest Anavrin kits I have built.
Lighting
The lighting system is excellent.

Three lights are installed near the end of the build and become the street lamps that illuminate the scene. Two are located on the right side and one on the left.
The wiring is secured using small U-shaped clips, which is a smart and practical solution.
The only slightly tricky part is routing some of the wires through narrow spaces between side panels and scenery sections. It requires a little planning and patience to keep everything hidden, but it is not difficult.
Overall I would rate the wiring system a perfect 5 out of 5.
Instructions
The instruction manual is very clear and easy to follow.
Assembly steps are logical and well illustrated, which makes this kit particularly suitable for beginners.
My only criticism is that some of the text and part numbering is printed rather small. Older builders may find themselves reaching for a magnifying glass more often than they would like.
The content is excellent. The font size could simply be larger.
Customizations
For this build I decided not to modify the basic structure.

There is one Sakura tree and one conifer tree included in the kit. I briefly considered upgrading them but eventually decided against it. This is a simple kit, and I felt it was perfectly acceptable for it to look like a simple kit.
Instead, I focused on adding greenery.
I planted numerous miniature flowers around the street using 3D flowers from Temu and added colorful climbing vines around windows, roofs, and building facades.
Some people may say that this no longer resembles the actual Kyoto location.
They are probably right.
However, I personally like the result much better. The extra vegetation makes the scene feel warmer, friendlier, and slightly more fairy-tale-like. Whether you agree or not is entirely up to you. Have a look at the photos and video and decide for yourself.
Difficulty
Beginner Friendly: Absolutely.
In fact, I would recommend this kit as a first book nook for many builders.
The construction is straightforward, the electronics are simple, and the instructions are excellent.
Ratings
Design
8 / 10
A beautiful Kyoto street scene, although somewhat sparse without customization.
Build Experience
8.5 / 10
Very relaxing and trouble-free.
Lighting & Wiring
5 / 5
Excellent design and very beginner friendly.
Instructions
4 / 5
Clear and easy to follow, but the text is too small.
Value for Money
5 / 10
Excellent quality, but the price is difficult to justify when compared to competing kits.
Overall Rating
8–8.5 / 10
Kyoto Gion is one of the easiest and most beginner-friendly Anavrin kits available. The quality is outstanding, the lighting system is excellent, and the instructions are among the best in the hobby.
The only major drawback is the price. If cost is not a concern, I can easily recommend it. If value for money matters to you, there are many alternatives that offer a similar experience for significantly less money.
Enjoy the photos and video, and let me know whether you prefer the original Kyoto appearance or my greener customized version.


Leave a Reply