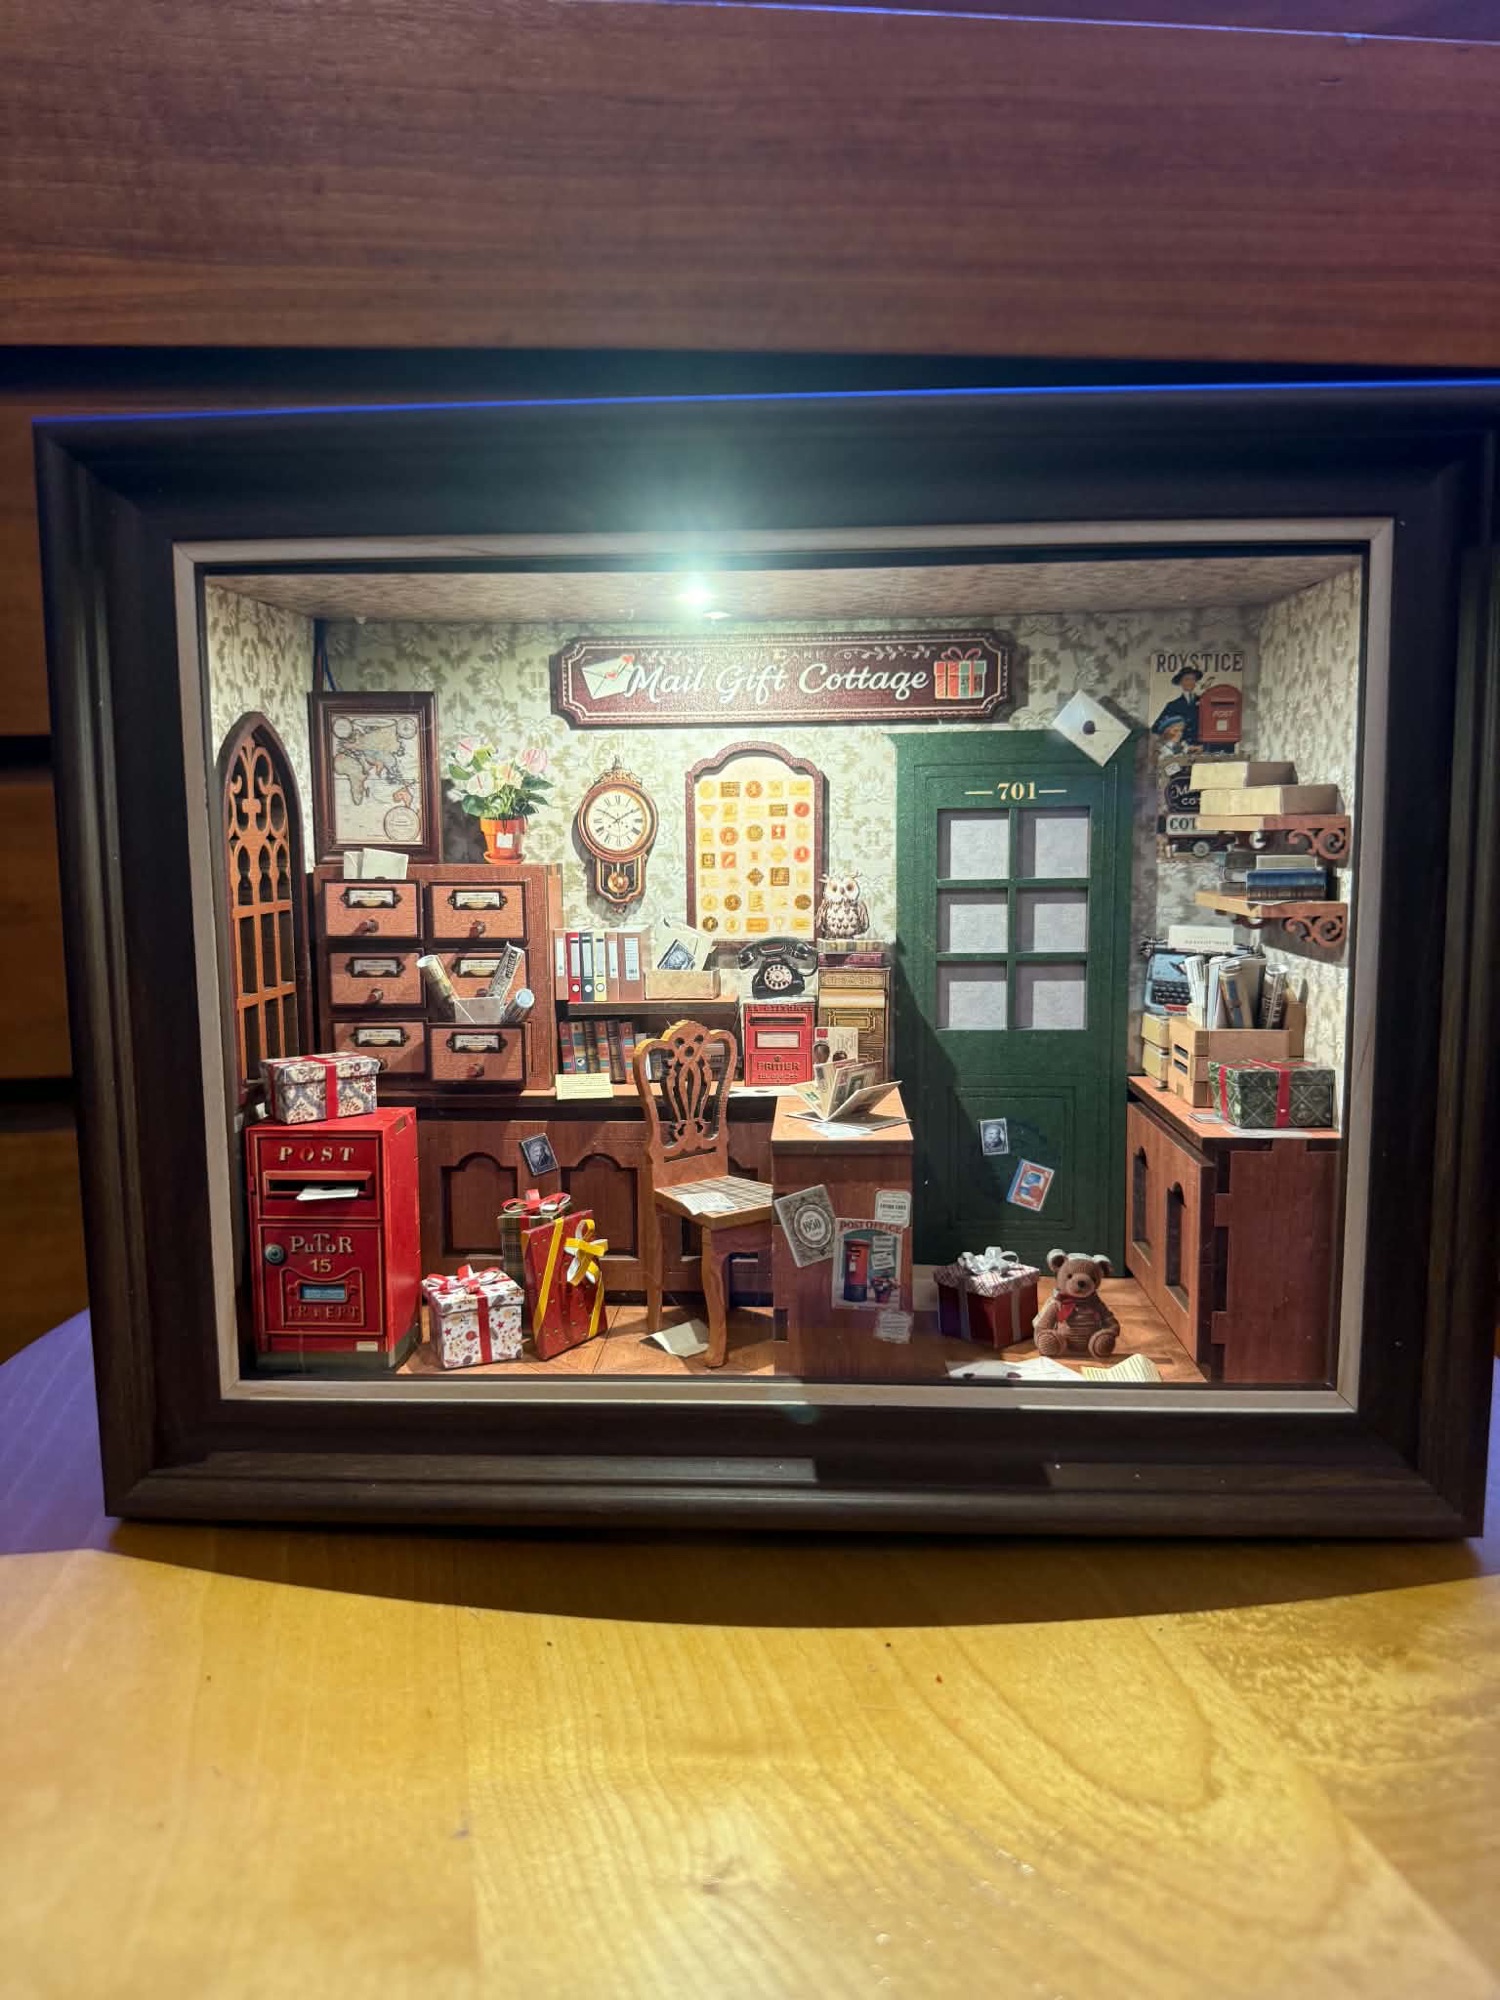
Build #31 by Martin Seidler
Buy this kit on Amazon UK: Check current price and availability →
As an Amazon Associate, Book Nook Workshop may earn from qualifying purchases at no extra cost to you.
MAIL GIFT COTTAGE was something a little different from my usual builds.
Technically this is not a traditional book nook at all, but rather a DIY miniature photo frame diorama — essentially another branch of the same hobby. And honestly, after building it, the overall experience still feels very familiar to anyone already comfortable with book nooks.
The kit uses the classic tabs-and-slots construction system combined with a simple lighting setup consisting of:
- a single LED
- touch sensor
- USB-C power connection
The engineering philosophy is very recognizable for experienced miniature builders.
Summary Table

The first big design question.
Normally I genuinely appreciate USB-C powered miniature kits. But here the choice feels slightly odd.
Since the finished model is designed as a hanging wall photo frame, I kept wondering why the designer did not simply use battery power instead. Hanging this on a wall while routing a visible USB cable feels a little impractical for the intended display style.
With only a single LED involved, battery power would probably have made more sense from a usability standpoint.
That said, batteries have their own disadvantages too, so it is not a completely one-sided issue.
What You Get Inside The Box

Inside the package you receive:
- roughly five or six MDF sheets
- tweezers and standard tools
- printed paper sheets
- decorative stickers
- accessory materials for envelopes, labels, newspapers, and scrolls
And one thing becomes obvious very quickly:
This kit is heavily focused on tiny decorative detail work.
Before even touching the main room structure, you spend a surprisingly long time constructing accessories such as:
- around a dozen miniature books
- eleven paper envelopes
- popup books
- file folders
- storage boxes
- flower labels
- various paper decorations
Some pieces are simple folded paper builds, while others are assembled more like wrapped miniature hardcover books.
Realistically, it takes one to two hours just preparing accessories before the main construction even properly begins.
Construction & Engineering

The cabinet assembly itself is very standard miniature-kit engineering with nothing especially difficult or unusual.
One design choice did stand out though.
The cabinet front panels are glued instead of snapped into place.
Initially I questioned this decision because most builders buying tab-and-slot kits expect minimal glue usage.
But after finishing the build, I actually understood the reasoning behind it.
Using glue here creates smoother uninterrupted cabinet surfaces without obvious segmentation lines, and visually the result works surprisingly well.
Builders who dislike glue-heavy kits probably will not enjoy this approach, but aesthetically I can absolutely see the logic.
Where The Diorama Comes To Life

Once the furniture and structural elements are assembled, the room initially feels fairly simple.
But the moment all the miniature accessories get added — envelopes, folders, books, labels, newspapers, and storage boxes — the entire scene suddenly becomes far more convincing.
This is definitely one of those kits where the accessories carry a huge amount of the final atmosphere.
The completed room ends up feeling cozy, populated, and pleasantly lived-in.
Instructions & Lighting
The instruction manual is excellent.
Everything is:
- clearly printed
- easy to follow
- logically arranged
- beginner friendly
There are very few confusing steps, and even newer builders should have little difficulty completing the project successfully.
The lighting system is also refreshingly simple:
- easy wiring
- reliable connections
- straightforward installation
- no complicated electronics
Unfortunately, the USB-C connector mounting itself is probably the weakest engineering point in the entire kit.
The cutout opening for the connector is noticeably oversized, and even after gluing it into position, the fit still feels loose and slightly unfinished.
For a brand with otherwise solid presentation quality, this honestly feels below expectation and probably costs the kit at least one rating point for me.
Final Assembly

The final stages are simple:
- insert the acrylic front panel
- attach the front frame
- screw in the wall hanging mount
Done.
And visually, the finished result is genuinely pleasant.
Not breathtaking or spectacular, but warm, cozy, and relaxing to display.
Customization Potential
There is definitely room for customization here.
Possible upgrades could include:
- additional flowers
- extra lighting
- 3D printed accessories
- weathering details
- enhanced wall textures
- more layered decorations
But honestly, this kit feels designed primarily as a comfortable out-of-the-box experience rather than a hardcore customization platform.
Aside from my usual edge coloring and cleanup work, I left this one mostly stock.
Final Verdict
MAIL GIFT COTTAGE ends up being a very pleasant surprise.
It successfully translates familiar book nook construction ideas into a different display format while remaining approachable, relaxing, and beginner friendly.
The miniature accessory work is probably the strongest part of the entire experience, adding a huge amount of charm and atmosphere to what initially looks like a fairly simple room.
There are a few engineering choices that feel questionable — particularly the USB-C mounting and wall-display practicality — but overall the kit delivers a cozy and enjoyable build with a satisfying final appearance.
For builders wanting something slightly different from a traditional book nook without dramatically increasing difficulty, this makes for a very comfortable and enjoyable project.
Copyright Book Nook Workshop 2026 – All rights reserved. (Martin Seidler)
Leave a Reply