Review submitted by John A. MacInnes.
John is a Book Nook enthusiast with 40+ completed builds and a growing collection still waiting on the shelves. He particularly enjoys atmospheric street scenes, creative lighting, and immersive miniature worlds packed with storytelling and detail.
| Category | Rating |
|---|---|
| Difficulty | Intermediate |
| Build Time | 8 hours realistically |
| Lighting | USB LED strips |
| Piece Count | 259 |
| Beginner Friendly? | Probably not |
| Value for Money | Poor |
| Recommended? | No |
First Impressions
Well… this review is going to be less “hidden gem” and more “public service announcement.”
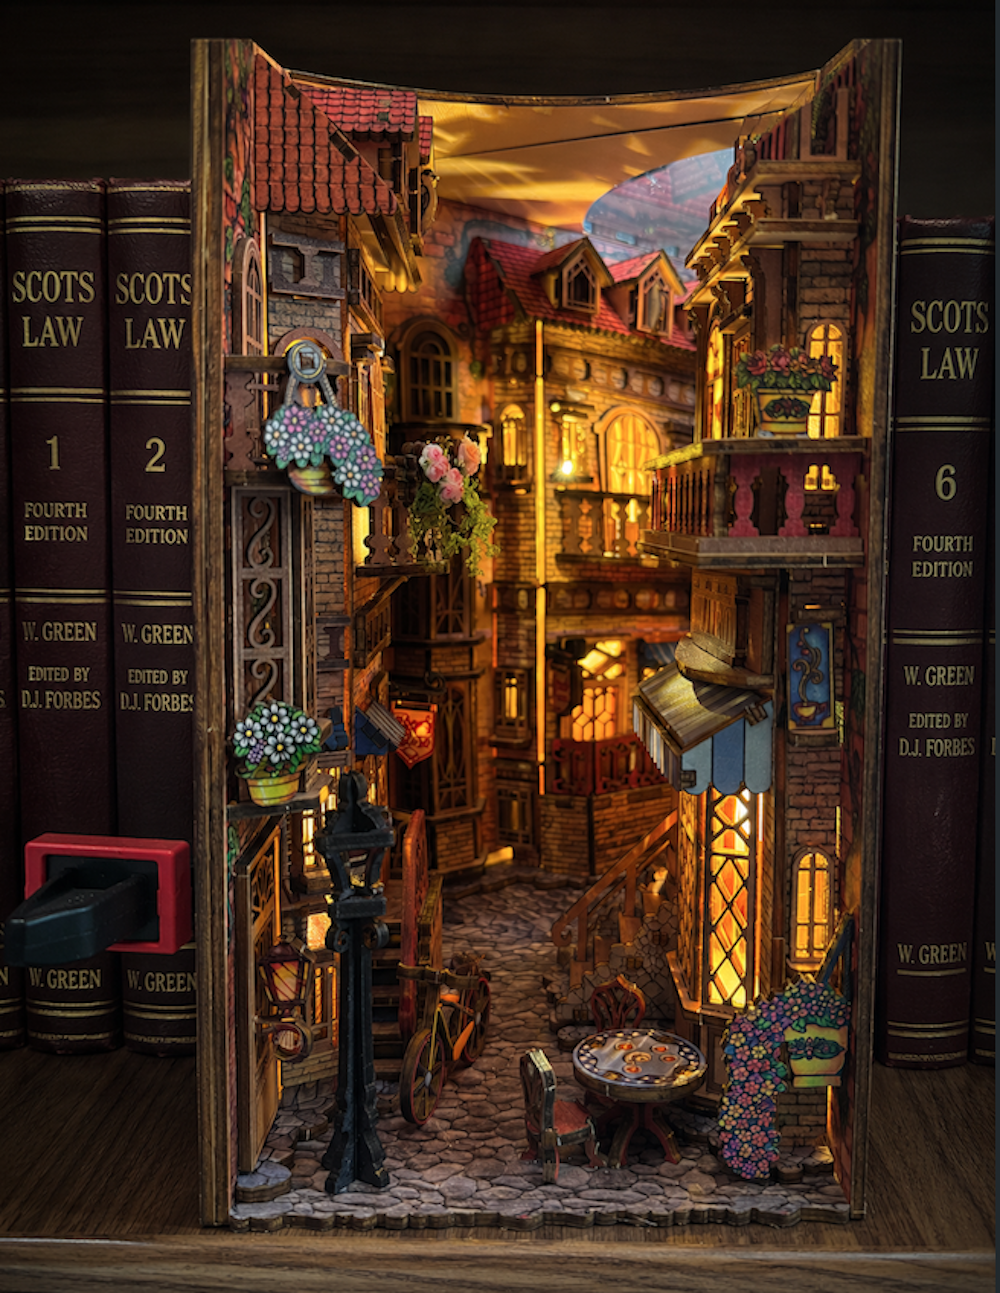
The kit in question is European Alley by Halom — a Vietnamese company who say they are new to the book nook hobby business. After building this one, I can only say they are very, very new.
At £45 plus another £15 shipping to the UK, I expected something polished and professionally produced. Instead, the first red flag arrived before I’d even opened the box. The shipping carton had what looked like a photocopied label slapped on it, which in hindsight was less “quirky indie company” and more “abandon hope all ye who enter here.”
Instructions & Build Quality

Inside, the instruction manual continued the theme. Again, photocopied. No written instructions whatsoever. Just pictures. Now, I’m perfectly fine following diagrams… assuming the diagrams actually show all the parts. Some sections weren’t marked, there are no board reference pages, and at times I genuinely felt like I was taking part in a woodworking escape room.
Halom claim a 2–3 hour build time. Absolutely magnificent comedy stroke that is.
Unless you possess the sanding speed of an industrial belt sander, there is no universe where this is a 2–3 hour build. More on that shortly.
The kit contains 259 pieces and is marked suitable for ages 14+. I’d personally class it as intermediate level, mainly because beginners may launch it into the nearest hedge after the first hour.
Materials & Part Quality

Opening the box revealed another surprise — no battery box. Instead, two self-adhesive LED strips connected directly to a USB plug. Fine in principle, although unexpected.
Then came the warped board.
At this point I was already concerned, but things somehow managed to deteriorate further. The material used is an extremely thin laminated plywood-style board and literally every single piece I removed had splinters. And I do mean every single one of the 259 pieces. Every build session became:
Remove part,
Sand part,
Repair part,
Question my thought process when I originally saw this on someone’s Facebook post.
Do not push pieces out from the front because the material marks incredibly easily… assuming the piece doesn’t snap first. I have genuinely never used so much superglue on a kit in my life.
That “2–3 hour” estimate quickly turned into closer to 8 hours once all the sanding and repairs were factored in.
Lighting Problems

And then we arrive at what may have been the most baffling omission of all — the lighting.
There are absolutely no instructions whatsoever for the light cable routing. None. At one point I discovered an unmarked piece with a random hole in it and eventually worked out that this must have been where the LED strip cables were supposed to pass through as it seemed to be the back wall, despite the fact it never got a mention anywhere!
Tiny problem though…
The manual tells you to stick the LED strips in place before this stage, meaning there is physically no way to feed the cables and switchgear through the rear wall afterwards. In the end I had to cut the wire, thread it through manually and solder it back together.
Final Verdict

By the end of the build I was left with one fairly substantial piece which, much like previous mystery components in this kit, is never mentioned anywhere in the manual. My assumption is that it was intended to stabilise or support the mirror film, however when the instructions tell you to install the mirror there is absolutely no reference on attaching it to anything else. It leaves the builder second guessing what the manufacturer intended.
In addition, both pre-printed side panels arrived noticeably warped and required gluing and clamping into place to sit correctly. Strangely, despite the effort put into the printed side sections, there is no corresponding pre-printed rear wall panel at all, leaving the back section as plain exposed wood which feels like a rather odd and unfinished design choice.
Now, I don’t mind problem-solving during a build. But this wasn’t clever engineering or a challenging design feature — it was simply basic planning detail that had been completely overlooked.
What frustrates me most as a builder is when manufacturers make claims that simply do not stand up to scrutiny from anyone with real experience of constructing these kits. There is little point cutting corners with sub-standard materials when the resulting build experience becomes this frustrating., or failing to have an instruction manual properly proofread to catch obvious errors and omissions. These are basic quality control issues, not minor teething problems.
And that sadly sums up the entire experience. There is actually the foundation of a nice kit here. The printed sections are acceptable, and the overall concept has potential. But potential alone doesn’t justify the frustration or the price tag. And there’s no reason I can see not to include a dust cover for the front, other than costs!
Halom seriously need to improve their materials quality, instructions, testing and overall quality control before these kits are ready to properly compete in an already busy market dominated by some top-notch pro manufacturers. Also worth noting — there are no spare parts whatsoever on the boards, which feels wildly optimistic considering how fragile many of the pieces are.
The point of honest guest reviews is so fellow builders can make informed decisions before spending their hard-earned money. Sadly, this is one kit I simply cannot recommend in its current form.
And if you do buy it… stock up on sandpaper, superglue and possibly a soldering iron before you begin.
Leave a Reply