
Introduction
A light-hearted and entertaining post on the “Notorious” Sea Breeze kit by John A. MacInnes
What Is the Sea Breeze Book Nook?
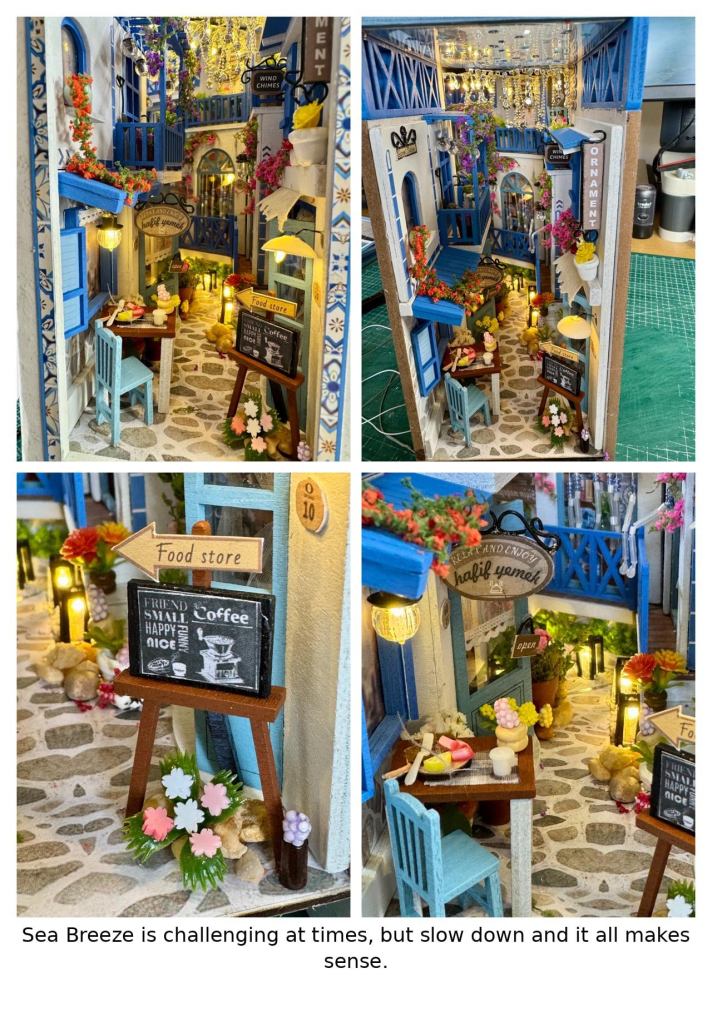
Sea Breeze is a Mediterranean-style alleyway scene, packed with:
- Blue balconies
- Hanging flowers
- Warm LED lighting
- Intricate handmade details
Unlike premium kits, this is not pre-cut and labelled cleanly — it’s closer to a scratch-build experience.
👉 If you’re new, check out:
Beginner Guide to Building Book Nooks
John’s Blog
Here’s a book nook kit out there that splits opinion faster than a group chat deciding where to eat, and its name is Sea Breeze. Now, if you’re expecting a relaxing, “click and fit” experience where everything slots together like a dream… think again. This is less kit and more character-building exercise. While most book nooks arrive all laser-cut and ready to behave themselves, Sea Breeze turns up like, “Here’s a vague idea—good luck.” At a bargain price that screams “what could possibly go wrong?” (spoiler: plenty), it lures you in from the likes of Temu and AliExpress before gently—then not so gently—testing your patience, creativity, and possibly your vocabulary.
So, you order it, full of excitement, already mentally clearing a prime spot on the bookshelf for your masterpiece. “It’s here!” you declare, tearing open the box and briefly wondering if modern packaging technology has advanced to the point of shrinking full laser-cut panels into a neat little cube. Alas, no—what greets you instead is an avalanche of tiny wooden bits, a stack of printed sheets thick enough to wallpaper a small room, several mysterious chunks of wood, and wiring so delicate it looks like it might snap if you so much as make eye contact with it. And as for the lighting? Let’s just say “plug and play” isn’t so much missing as it is a wildly optimistic concept.
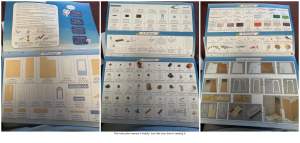
All the little bags of bits are supposed to be neatly labelled A to G, nicely matching the instruction manual like some sort of organised dream. In reality? Not a letter in sight. So begins the delightful game of “Guess That Component,” where you pull out a random piece and squint at the inventory list, comparing shape, colour, and size like you’re auditioning for a woodworking version of Mastermind. For many, this is the moment sanity starts to wobble—long before a single drop of glue is applied. Oh, and speaking of glue… did I mention you have to supply your own? Because of course you do.

But not to be outdone, “it can only get better,” I hear you whisper. Hmmm… about that. You now find yourself staring at the instructions—if we’re being generous with that term—squinting at tiny pictures on a screen, trying to work out why on earth you’ve been supplied with what appears to be enough microscopic beads to start a nursery class in friendship bracelet making. At this point you’re no longer building a quaint seaside scene; you’re questioning life choices and wondering if somewhere, someone is missing an entire jewellery kit.
So, you’ve made your bed, so to speak—no turning back now, let’s crack on.
Your first task is to cut out the body sheets and glue them onto the pre-cut wooden sections. Simple enough on paper… and then reality arrives. A wee tip here: most folk will reach for standard PVA glue, but I found it about as cooperative as the rest of the kit—it doesn’t spread well and loves leaving wee lumps underneath. My workaround? Use a vinyl cutter squeegee tool to smooth it out properly. It flattens everything nicely and saves you from ending up with panels that look like they’ve developed a skin condition.
Also, and this is important for both your sanity and the final result—only work on one piece at a time. Even if you’ve cut out a batch and you’re feeling confident. This kit has a funny way of punishing overconfidence, so take it slow… it’s less “production line” and more “one careful step away from chaos.”

Paper pasted and (finally) left to dry—now comes what I suspect is the first proper trial for most people: the dreaded butt joint. Two innocent-looking pieces of wood, a bit of glue, and suddenly you’re questioning your life choices again.
Personally, I use B7000 glue. It spreads easily, dries clear, and once it’s set, it’s going absolutely nowhere. The real winning touch though is that it gives you a bit of wiggle room—you can still tweak and nudge pieces into place before it commits to its final decision, unlike some glues that lock in your mistakes instantly for all eternity.
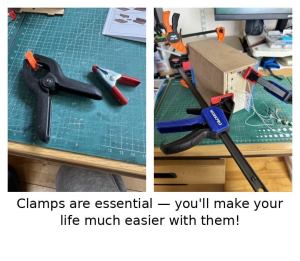
Now, let’s talk clamps—because these aren’t optional, they’re essential. If you don’t get a clean 90-degree angle here, everything that follows (walls, base, roof, your sanity) will be slightly off and stubbornly refuse to line up. This is the foundation moment, so take your time with it. If clamps aren’t in your toolkit, you’ll need some creative way of supporting the walls while they dry—books, boxes, sheer determination—whatever works. Just don’t rush it, unless you fancy building something that leans like it’s had one too many at the pub.
But in fairness to this kit, it does contain every single piece you need to build it — nothing’s missing, nothing’s mysteriously “sold separately.” What it does require, however, is time. And patience. And then a bit more of both for good measure. Because absolutely everything is built from scratch — chairs, tables, windows, shutters… if it exists in miniature seaside life, you’ll be gluing it together one tiny component at a time. This isn’t a quick weekend “ta-da!” project; it’s more of a slow-burn relationship.
The manual, to give it credit, is actually quite helpful. If you’re unsure about a part mentioned during a step, just check the code on that page and flip to the front of the booklet. It’ll tell you whether it’s wood or plastic, along with the colour and size. So technically, you can’t really go wrong. It’s just a very different experience if you’re used to kits where everything is neatly numbered on laser-cut sheets and pops out with satisfying precision. Sea Breeze prefers to make you work for it — and occasionally question your commitment to the hobby along the way.
So step one, after glueing your wall panels at 90 degrees and putting a bottom in for support is the lighting!
Lighting
Ah yes… the pièce de résistance — the lighting. The moment where you either feel like a miniature electrical engineer… or someone who’s just opened a bowl of festive spaghetti.
Let’s be honest: the manual here can be confusing. Not impossible — just not intuitive. Even with the colour images, you’ll find yourself staring at the page thinking, “Surely that can’t be right?” My advice? Give yourself extra time and only tackle one section at a time. This is not the stage for rushing or heroic multitasking.
What I ended up doing was reading the lighting section once… then again… and then a third time for good measure. After that, I drew myself a rough wiring diagram showing where everything needed to run. It might sound excessive, but it saved a lot of head-scratching later.

Another tip — and learn from my mistake — don’t use hot glue to secure the wiring to the walls. I thought I was being efficient. I was not. When it came to fitting other parts, the raised glue blobs stopped surfaces sitting flush, and I ended up carefully cutting sections back out. Not my finest hour.
The good news? The LED diodes don’t need millimetre-perfect placement at this stage. As long as they’re roughly where they need to be, that’s good enough. You’ll almost certainly tweak and adjust them when fitting the shop sections anyway. Think of it less as precision engineering and more as “guided optimism with wires.”
Shop Interiors
Now we come to the shop interiors — the little sections that sit on the left and right-hand side of the street. On paper (quite literally), they sound charming. In reality, they are constructed mainly from… well… paper. And not the reassuringly sturdy kind either. We’re talking wrinkle-at-the-sight-of-glue paper. Look at it too sternly and it’ll crease. Apply glue too generously and it’ll ripple like a stormy sea.
These sections need a surprising amount of adhesive to persuade them to lie flat against the wall panels, and even then it can feel like you’re negotiating a peace treaty rather than building a model. Take your time here, smooth everything carefully, and handle with extreme caution — they’re easily damaged and once they crease or tear, there’s no elegant way back. This is definitely one of those “slow and steady” stages… deep breaths recommended.
The door and window fabrication was uneventful, adding frill trim and something resembling net curtains was easily undertaken.
Cutting the plant material and popping it into the tiny pots? No drama whatsoever. In fact, it all goes suspiciously smoothly. This is the point where you start thinking, “I’ve cracked it. I’m in control now.” You are not. You are absolutely not.

Next up is what appears to be a harmless bit of pink string. Except it isn’t string. It’s crepe paper in disguise. You unravel it, only to discover that the instructions then ask you to roll it back up again — but from a completely different angle — before snipping microscopic sections off the end. These tiny fragments are then supposed to transform, as if by miniature wizardry, into roses for the walls and pots. It’s less crafting, more botanical illusion.
At this stage, I decided it was time to enter Customisation Mode. Honestly, hacking up some small plastic flower elements I’d bought from another online supplier just made far more sense to me. I also introduced some ready-made material to create bougainvillea-style vines climbing up the façade. Not only was it less fiddly, it instantly lifted the whole scene and gave it that sun-drenched Greek island feel — like a tiny alleyway you’d wander through on holiday, minus the glue on your fingers.
👉Harvesting cheap kits from Temu for customisation
To be honest, there are several points in this build that will properly test your commitment to the hobby. Take, for example, the signage. What sounds simple enough turns into a session involving two pairs of needle-nose pliers, a length of stubborn metal wire, and a growing suspicion that you’ve accidentally enrolled in a jewellery-making course. Bending the wire neatly into shape is possible — eventually — but not without a bit of colourful language.

And then… the shutters. You might be imagining some neatly pre-cut, ready-to-fit pieces. Oh no. You are the shutter manufacturer now. Out comes the blue paper. You fold it, score it, slice it into thin strips to form individual louvres, and then attempt to glue them together in a way that both resembles shutters and remains structurally intact. It’s delicate, fiddly, and requires the patience of a saint. If you even make it that far.
At this point, I made an executive decision: life is simply too short. Customisation mode re-engaged. I had some net curtain material left over from another project, so the idea of painstaking paper louvres was swiftly abandoned. The shutters became net-curtained windows instead — far easier, far less stressful, and arguably more charming. Sometimes the best build choice is knowing when to say, “Nope — we’re doing this my way.”
And, I urge you to consider when all seems lost to take five, sit and look, and think outside the box. How else could you achieve some sort of synergy with the overall project design. I’m fairly certain you’ll have an idea you can import to Sea Breeze. And isn’t that part of the joy of this hobby? We don’t have to rigorously follow evert step to the letter. Sometimes a happy mistake can occur, and you’ll look at your wee build in a different light. Don’t be scared of making a mistake, most, if not all can be rectified or changed into something else. The judicious placement of a flower pot to hide a piece of torn wallpaper. Covering up a badly fitting balcony joint by hiding it with some vine material.
Now to the beads… ah yes, the beads. Did someone mention beads the size of rice grains — with others barely larger than the head of a pin? These are destined to become delicate beaded door curtains, which sounds wonderfully authentic until you actually try threading them. The manual cheerfully instructs you to poke them onto some flimsy thread that appears to have a mind of its own. Sometimes it glides straight through like a dream; other times you’ll realise you’ve been prodding the same microscopic bead for the better part of an hour, only to finally get the thread through — reach to grab the end — and watch the blessed thing slip straight back out again. At this point, even monks would start muttering.
I’ll admit, the beaded door curtain does look rather impressive once it’s finally finished, and you do get a small moment of “fair enough, that was worth it.” But then the instructions casually mention making forty roof-hanging bead models. Forty. That, dear reader, was the straw that broke this particular camel’s back.
So once again, into Customisation Mode we marched. A quick rummage through my wife’s sewing basket revealed some rather fetching beaded crystal trim — and that was that. Borrowed (without so much as a committee meeting), trimmed to size, and fixed neatly into place with the hot glue gun. Job done. In fact, if I’m being completely honest, I reckon the result looks better than the original plan — and it only took a fraction of the time and a lot less of my sanity with it.
But when all’s said and done, we Nookers do like a challenge, and Sea Breeze delivers one in spades. This is not a kit that politely holds your hand — it gives you a shove, points vaguely in the right direction, and wishes you luck. Yet somehow, despite the muttered grumbling, the occasional deep sigh, and at least one moment of wondering why you didn’t just take up knitting instead, you keep going.
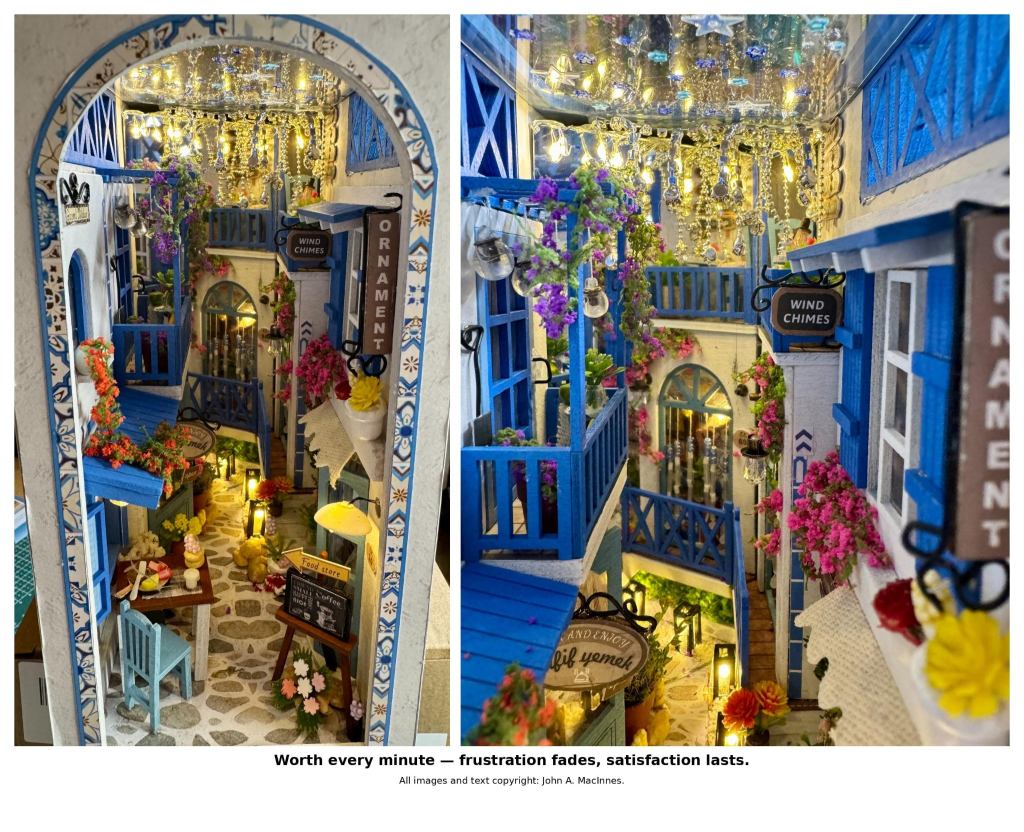
And here’s the thing — when you finally place that last piece, tuck in the final wire, and flick the switch to bring the whole scene to life, the sense of accomplishment is like no other. You don’t just finish this kit — you survive it. And once it’s sitting proudly on the shelf, glowing away like a tiny Mediterranean street at sunset, you’ll look at it and think, “That nearly broke me… but I’d absolutely do it again.”
Would I attempt a second scratch-built kit rather than my usual trusty click-and-fit? Absolutely I would. In fact, the very same manufacturer that brought us Sea Breeze also produces a model called Bruges Ancient City — and, would you believe it, there’s already one sitting quietly in my stash, waiting its turn. Not tomorrow, mind you… let’s not get carried away. Some emotional recovery time is required first.
Because that’s the strange magic of kits like this: they test your patience, your eyesight, and occasionally your grip on reality — but once you’ve conquered one, there’s a tiny voice in the back of your head whispering, “Go on… you know you want to.” And sooner or later, you find yourself browsing listings again, convincing yourself that this time it’ll be different. It won’t, of course — but that’s half the fun.
If I can give you one tip that’ll make your life so much less stressful, it’s that you must take time with the very first two panel wall section build. Get it right at a good solid 90 degrees, and you’re off and running
👉 Check out the price of Sea Breeze here
👉 Or why not have a go at John’s next model, Bruges Ancient City

Leave a comment