Overview
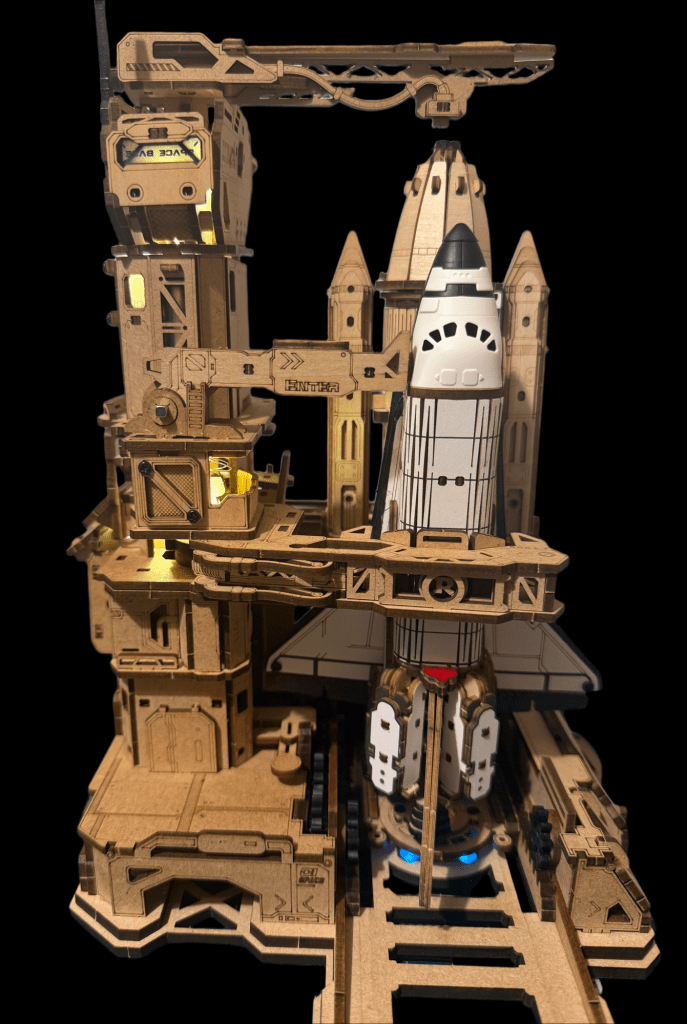
The ROKR Space Shuttle Launch Tower is probably one of the most challenging models I’ve built so far — but also one of the most rewarding.
As the old saying goes:
“The harder the climb, the better the view from the top.”
ROKR are a top brand specialising in moving wooden mechanical models, and this kit is a perfect example of how far they push engineering in a wooden model.
My first ROKR build was the ROKR Marble Run, which introduced me to wooden gears and mechanical motion. The Space Shuttle takes that concept several levels further.
Two Major Challenges in This Kit
This model has two particularly difficult sections:
The gear system that moves the launch tower arms The electronic control system
Both require patience and careful preparation.
Challenge 1 – The Gear Mechanism
The first major challenge is the gear system that controls the moving launch arms and shuttle platform.
Wood-on-wood gear systems can create friction, so preparation is essential.
Key tips:
Sand every gear tooth carefully Ensure every piece removed from the wooden board is perfectly smooth Even a tiny notch can stop the mechanism moving properly
The kit includes a small stick of wax, but I personally prefer using a tiny amount of Vaseline, applied with a small brush between the gear teeth.
This significantly improves movement and reduces friction.
(Insert gear close-up photo here)
Another important point:
⚠️ ROKR kits should not require glue.
Every piece is designed with precision slots and pressure fits.
You will almost certainly need to take parts apart occasionally to make adjustments or add pieces you missed — and trust me, that happens!
If glue had been used, correcting those mistakes would be much harder.
Challenge 2 – Electronics and Wiring
The second major challenge is the electronic system, which is far more complex than most wooden kits.
The Space Shuttle includes:
2 motors controlling the swing arms A long LED light strip A landing light module 3 additional switches A central control unit
The central controller has five connection slots, and identifying which connector goes where is the first challenge.
Before starting the build, I strongly recommend performing a full electrical test.
Unfortunately, the instruction manual doesn’t explain this particularly well.
Essential YouTube Tutorial
I highly recommend watching the tutorials from Gary Builds on YouTube.
Gary clearly demonstrates how to run the electrical circuit test before beginning the build.
You may need to watch the tutorial several times because the test requires multiple actions in the correct sequence and within a short time period.
Once you understand the process, testing the electronics becomes much easier.
A Small Disaster (and Great Customer Service)
During my build I ran into a problem.
After repeatedly testing part of the mechanism, I accidentally broke one of the electrical wires.
That meant the build had to stop completely.
To their credit, ROKR customer service was excellent.
They have an online form where you can request replacement parts, and they sent me an entire bag of replacement electrical components free of charge.
The only downside was that shipping from China took a couple of weeks.
That said, this kind of support is often better than what you receive from large online marketplaces.
Custom Touches
While waiting for the replacement parts to arrive, I took the opportunity to add some personal touches.
I used acrylic paint to add detail to sections of the shuttle, which gave the model a slightly more realistic appearance.
This is something I would definitely recommend if you enjoy customising your builds.

The Final Launch Test
Once the replacement parts arrived, I completed the build and it was finally time for the moment of truth.
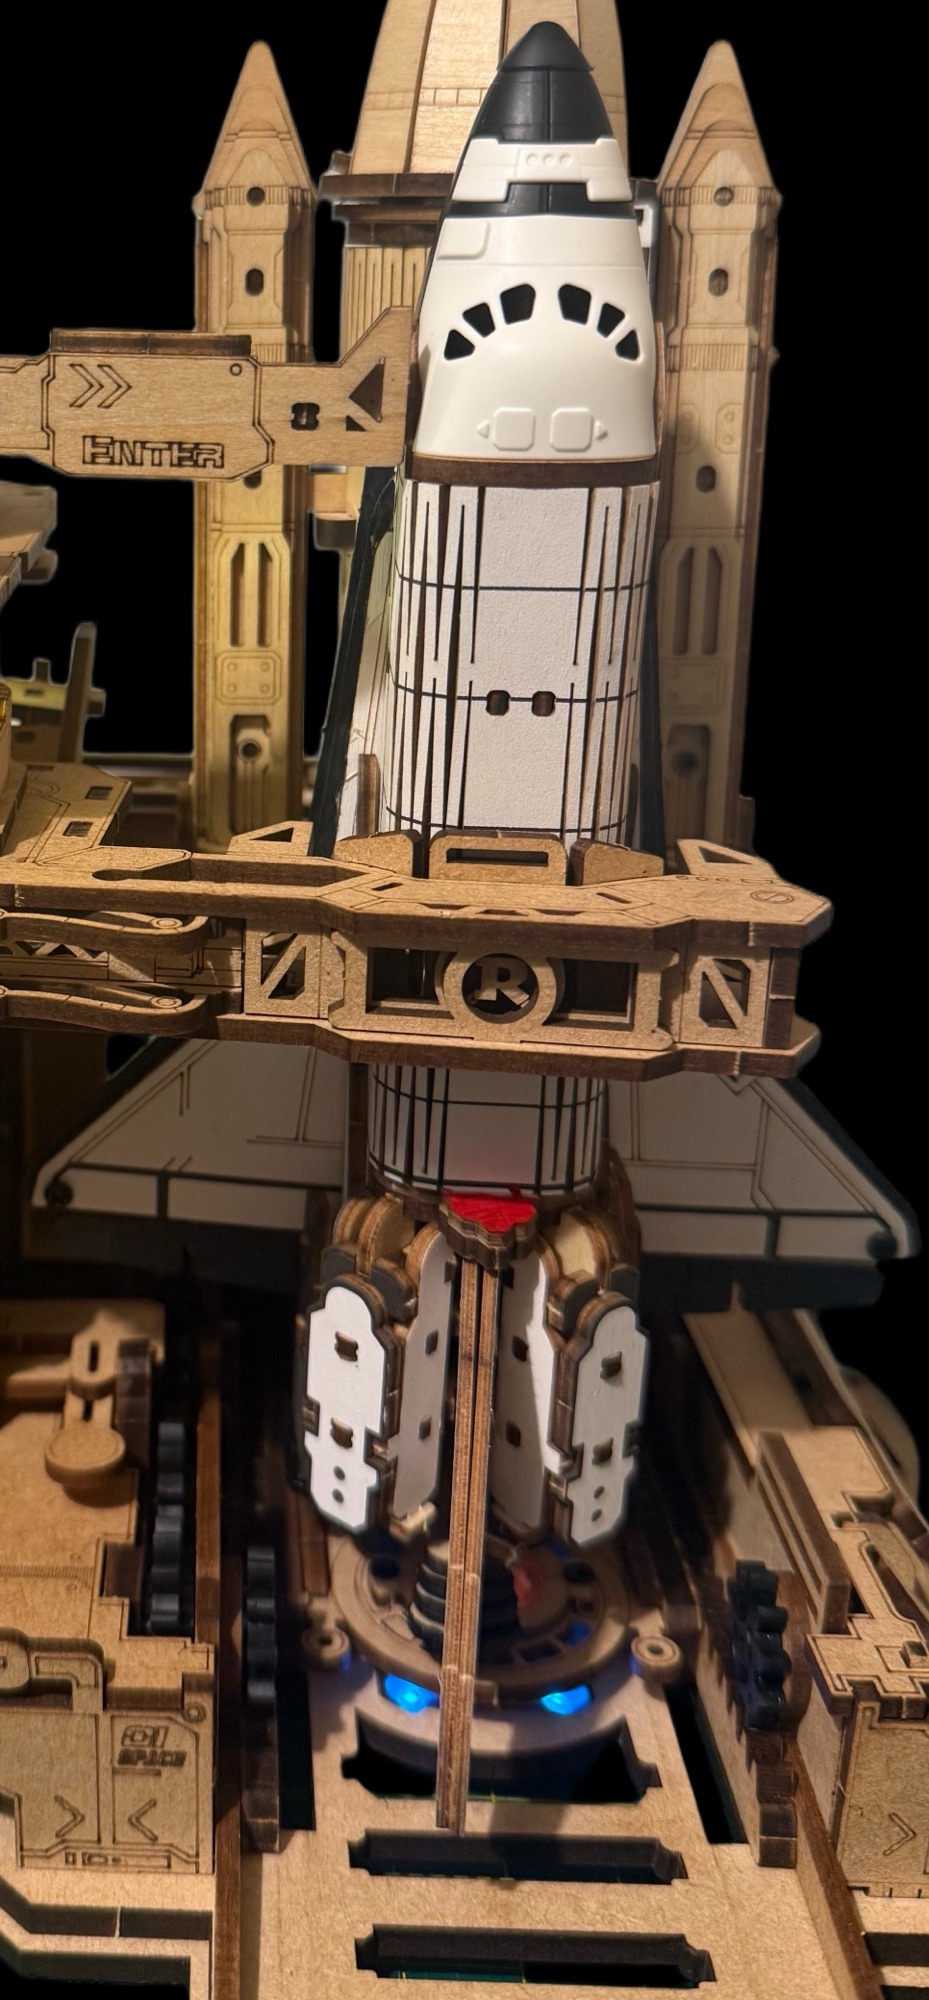
I pulled the first lever.
The LED strip illuminated the entire launch tower.
Next, I pressed the start switch.
The sequence began:
The launch arms slowly swung backwards The shuttle moved backwards along its track Then the system reset
Press the switch again and the final sequence begins:
The shuttle returns to its upright launch position The arms swing back into place The launch light begins flashing The tower lights pulse dramatically
At that moment there was only one thing to say:
Mission accomplished, Captain Kirk.
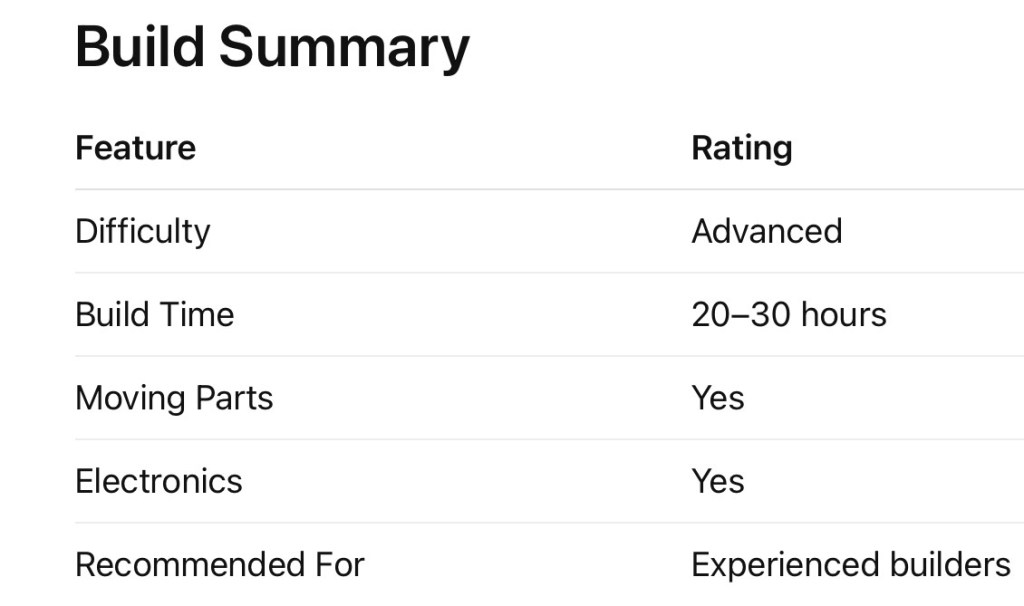
Build Summary
Final Thoughts
The ROKR Space Shuttle Launch Tower is not a beginner’s kit.
However, if you enjoy mechanical models, electronics, and complex builds, it is incredibly rewarding.
With patience, careful sanding, and proper lubrication, the final result is one of the most impressive wooden models I’ve seen.
And when that launch sequence finally works…
…it’s worth every minute.

Leave a comment